Painting Trees In Watercolor | Easy Watercolor Painting of Trees - Step-by-Step | Various Techniques
Above is a video of how to paint watercolor trees (plus shrubs) and other techniques from one of our co-founder Ardak Kassenova's LIVE tutorials. Catch new LIVE tutorials every week on our Facebook group - Painting Inspiration Daily. Follow us on our YouTube and Instagram channels for updates and more videos.
You might also be interested to learn what the main differences are between watercolor and acrylic, drop by our previous Toolkit article - Acrylic vs Watercolor - The Key Differences. You'll see very useful painting comparison examples! Now on to painting watercolor trees!
TABLE OF CONTENTS: TABLE OF CONTENTS: Looking for something in particular? Jump ahead using the links below:
Painting Trees In Watercolor
Easy Watercolor Painting of Trees - Step-by-Step
List of Materials
Tree Sketching And Source Of Light
Tree Painting - The Foliage
Painting Trees - The Tree Trunk
Painting The Final Details
Painting Trees In Watercolor
Trees are such great subjects to paint, whether just one, a few, or a whole forest of them. You can create an endless array of textures and effects when painting them in watercolor. Unless you're really looking to paint them hyper-realistically, trees are best painted in a more impressionistic fashion. To see the tree or trees as a whole and not to be overwhelmed by each part separately. It's so easy to get overwhelmed if you start thinking about painting so many leaves in detail (gasp!), the good thing is - you don't have to!
The trick I use is, I squint my eyes when I look at the trees to sort of blur them. Instead of seeing the leaves clearly and in detail, I see a simpler and more basic image. A variety of shapes, colors, and different values. Now, it's so much easier to paint them.


Easy Watercolor Painting of Trees - Step-by-Step
List of Materials
- Watercolor paints - I used the Sereno Palette from ZenART Supplies.
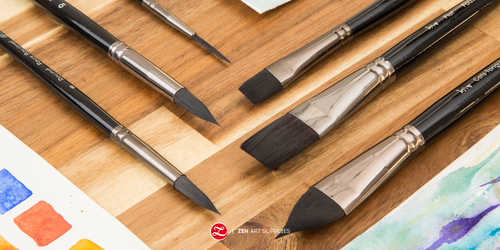
- Watercolor brushes - some brushes from our Turner Collection.
- Watercolor paper (the thicker it is, the more washes it can handle).
- Mixing plate
- Paper towel or other absorbent material you prefer.
- A jar or two of clean water.

I'll be using these two trees shown in the photo below as my reference.


Tree Sketching And Source Of Light
You don't need to make a detailed sketch since you won't be painting in high detail. Just loosely sketch the overall shape and structure of the tree - the leaf form, the trunk, some of the big branches if any are visible.

The source of light is most probably the sun if you're painting trees during daytime. Locate the direction where your source of light is coming from so you can determine where the shadows and lighter tones of your trees will be. This is an important step that you shouldn't overlook or skip when painting watercolor trees.

Tree Painting - The Foliage
The Lightest Color First
Now that you've determined where the light is, you can easily plan out the different colors you'll be using to show the changing values. With watercolor, you always start with the lighter colors or thinner washes first. Using the reference photo as my guide, I have decided that the first color and layer I'll be using is a warm green. The warmth of the sun turning the leaves a bright and vibrant green.
I mixed bright and warm yellow-green mixtures for the first layers of the two trees. For a quick and easy guide to the basics of watercolor painting, have a look at How To Watercolor For Beginners Tutorial.

For the tree on the left, I'll be using a dry-ish brush technique to add an uneven texture effect that will look like clumps of leaves. For the tree on the right, a wet-on-wet application. You can leave some white spots unpainted here and there to show spaces where the sky or light filters through. Use a lighter wash to paint the tree trunk in to start establishing it, and for the ground around the tree as well.

The Midtone Colors
You don't have to wait for the first layer to dry for both trees. It's up to you if you want a wet-on-wet blending with softer edges or a wet-on-dry layer kind of blending for your watercolor trees. Add the mid-tone greens here and there. Make sure to leave some parts with the lighter green showing through, especially where the sunlight touches it the most. You can lift off some of the paint in some areas using your brush or a paper towel to create a dappled effect.
For the midtones I mixed a darker and less warmer green for the small tree, and a more neutral green for the big one.

For the tree on the left, I'll continue using the dry-ish brush technique. The one on the right is still wet-on-wet. Use the same for the tree's cast shadow on the ground. And just like before, use a lighter wash and include painting the trunk of the tree.
The Shadows And Deeper Colors
Now it's time for the darker shades of green for the shadows, you can have more than one shade for this if you feel like it. The more color variations you have, the more realistic it will seem. But not too many mind you, or you'll end up with a muddy tree. Paint the parts of the tree that are farthest from the sun generously, and then tapering off towards the section nearest the light source.
For the shadows of the big tree, I mixed Phthalo Green, Prussian Blue, and a little Umber to tone down the vibrancy. When tree painting, try to balance the warm tones and the cool tones to get good contrast.

For the small tree, I mixed a deeper green using Phthalo Green and the previously mixed green for the second dry-brush layer earlier.

Don't forget to finish painting the tree's cast shadow on the ground as well. You can also add a bit of grassy texture.
Painting Trees - The Tree Trunk
For the tree trunk, I'll continue with a mid-tone brown all over, from the trunk to the branches. Remember to branch out starting from the trunk and then moving outwards. You can lift off some of the paint using your brush or a paper towel to create extra texture and value variations. Then use a darker brown to add extra trunk details as well as the shadows.

For the smaller tree, I used Umber to paint both the midtone and the shadows. I lifted off some of the paint to mimic the dappled look from the sun shining through. While the big tree's trunk is heavily shadowed, I used Prussian Blue, Phthalo Green, and Raw Umber to create a very deep color.
Painting The Final Details
For the foliage, add small pointy dabs all around to show that some leaves are poking out here and there. Keep it loose, uneven, and varied just like how the real leaves are. This extra detail will give your tree a more natural and organic look.
For both my trees, I added one more layer to further deepen their cast shadows. Keep checking with your reference photo to see if you more or less got the essential details of your tree.

And that's it! You now have simple yet beautiful watercolor trees to enjoy!
I hope you learned useful techniques from this step-by-step watercolor tree painting. Remember not to stress out about the tiny details, think of the tree as a whole. Don't be too hard on yourself if you're not happy with your tree painting. Just keep trying and experimenting, and you'll have perfected it in no time. There are just so many unpredictable results when painting in watercolor and it's different for everyone. The wonderful discoveries you'll find make all the practicing worth it.
We'd love to hear back from you!
What kind of tree/trees would you like to practice painting? Which technique did you enjoy the most, wet-on-wet or dry brush? What future content would you like to see from us? Let us know what you think, we'd love to hear back from you. Feel free to leave a comment, and we'll be happy to answer any queries you have.
Find out the different brush strokes you can use when oil painting in our next Toolkit article - Oil Painting Brush Strokes and Techniques. Meanwhile, have a great time painting trees in watercolor!
- MEET THE AUTHOR-

Kathleen is the Wordsmith at ZenART, resident artist and art editor. When God sent a shower of talents, Kathleen made sure she got a basketful of them! She's a visual artist with practical knowledge on various fields from painting and sculpture, to costume and set design which comes in very handy when writing about various art techniques and theories. She also shares her passion for the arts through teaching. She runs her own brand of handmade wirework jewellery designs.


