What Colors Are Tropical? | The Cool and Serene Color Palette | The Lush Greens and Blues Color Palette | The Warm and Vibrant Tropical Color Palette
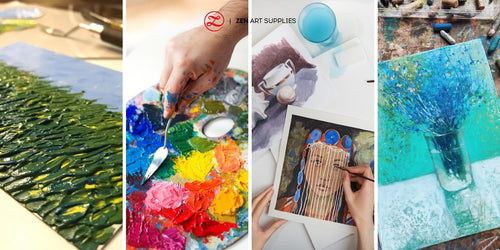
Summer, the warmest season of the year. The days are longer and the nights are shorter, sunrises come early and sunsets later than usual. When I think of summer - warm weather, vacations, and beach trips spring to mind. With our busy lives nowadays, we don't always get the chance nor the time to have that much needed tropical getaway we all long for. But don't despair, you can bring the tropical color palette vibe to your home instead. Here, I've created three sets of color palettes that I hope will inspire you to create your own tropical color themed paintings to brighten up your home!
TABLE OF CONTENTS: Looking for something in particular? Jump ahead using the links below:
What Colors Are Tropical?
The Cool and Serene Color Palette
The Lush Greens and Blues Palette
The Warm and Vibrant Tropical Color Palette
What Colors Are Tropical?
Inspired by the tropics, the parts of the world near the equator where the weather is warm and humid. These colors are from the surrounding natural environment, from the bodies of water to the tropical flowers, from the food to the various cultures. The flora and fauna, and everything in between. Here are just some of those colors.

You might have missed our last article, Watercolor Still Life Painting - Step By Step. Drop by and find out how you can start your still life painting in watercolor using a simple but eye-catching composition. Watch the accompanying video to see how it's done and be inspired to start your very own!
The Cool and Serene Color Palette
These tropical color palettes are near and dear to my heart as I am from a tropical country. For this palette that's first on our list, these are those days on the beach where I'm just lazing around by the sea with a good book and a refreshing drink on the side. Pristine beaches with pale sand, the blue skies, and the colors of the water ranging from aqua, to turquoise, to the deep blues and greens.
I used watercolor to paint this one as I think it's perfect for that soothing yet refreshing combination. It's a simple beach view taken from above, a bird's eye view of the waves softly breaking on the sandy shore.

For this painting project I chose ZenART's Sereno Palette, it has all the colors I need to paint this beautiful seascape. It's perfect for various kinds of landscape paintings and botanicals as well, just look at the color swatch below for a sampling of all the awesome colors this watercolor palette contains.

I've swatched out the colors I used so you can use this as a guide, you can see it labelled in the photo above. Feel free to tweak the colors to your own preference. I didn't have to do much sketching for this one, just the line of seafoam on the sand. One of the basic rules of watercolor painting is to paint from light to dark. Below I started with a very washed out Hansa Yellow and Aqua Blue applied on an evenly wet surface. I gently blended them together where they met midway on the paper.

After the first layer dried, I carefully re-wetted the surface and added the next layer - this time using Yellow Ochre and Manganese Blue (1). A less washed out mixture but not too intense either, I wanted to slowly build my layers to take advantage of the watercolor's transparency effect. Check out our watercolor for beginners tutorial for a useful guide when starting out in your watercolors, from the materials you need to the basic techniques.
Again I allowed the previous layer to dry before working on the next one (2). I applied Prussian Blue with dabs of Emerald Green here and there and allowed them to bleed onto each other for that sea-green color. For the sand, I added another layer using Raw Sienna to temper the yellowness and achieve that nice sandy color.

It's time to do more work on the water by adding the soft waves, using a mixture of Prussian Blue and Emerald Green (3). I actually tilted my paper to allow the mixture to trickle down in a more natural pattern, with much careful guidance. Don't be afraid to try out and experiment with different techniques. I left it to completely dry and took a short break - because the next step is quite a lot of detailed work!
For the waves, I used white gouache instead of painting around the whiteness of the paper, using masking fluid, or white gel pens. It's up to you which method you think works best for you. Try them all out and see how each one performs. I used a detail brush from ZenART's Fine Line collection to paint the intricate waves in.

Here's a closer look at the final painting for the Cool and Serene tropical color palette. The seafoam was the most challenging part, but I can truly say well worth the effort.

Here's another "cool and serene" palette painted using watercolor by ZenART's in-house artist, the lovely Theodora. Why not try painting an underwater scene in watercolor as well? Watch the video to see the step by step tutorial!
The Lush Greens and Blues Palette
This tropical color palette takes you to a lush tropical garden or rainforest where you're amidst the vivid greens and blues of the surrounding flora. Deep blues and greens for a more dramatic set of colors that still veers towards the cooler tones. I find these colors help me relax and are perfect for my introspective moods.
For this painting, I chose gouache to even deepen the colors in more opaque applications. Here is the swatch I made for the colors that I used.

Below is the reference photo I used. I picked a simple composition and changed the color of the background to a deep blue-green instead of the yellow. You can even start with painting just one leaf.

First, I sketched out in detail all three leaves. I didn't have to worry about sketching lightly since I plan to apply the gouache in a thicker consistency. Then I painted a light wash all over using Acid Blue.

Once the first layer had dried, I started working on the leaves. I first painted the base color that I mixed using Grass Green and Jade Green. Then I prepared my lighter green - a mixture of Lemon Yellow and Grass Green, and my deeper green - Jade Green. It's a good idea to have my mixtures ready beforehand as I paint them interchangeably as I move along the leaves. I used the dry brush method for the textural effect on the leaves, and added a little water to the mix for easier blending.
With thicker painting in gouache you have to be extra careful when layering, the color below can be lifted off if you repeatedly go over the same area. And if you apply too much pressure, keep that in mind when painting this way. Here I took some close-up photos for you to see them better.

After I finished painting the leaves, I allowed them to completely dry before adding the background color. I mixed Acid Blue and Prussian Blue to get that nice deep blue I was looking for. Acid Blue was too bright and Prussian Blue too dark, but together they were perfect for this particular tropical color palette I was aiming for. Notice how the leaves seem darker against the lighter blue background, and brighter against the darker blue.
Don't underestimate your choice of background colors, it can totally change the final look of your work. For the final touch, I used Titanium White to break the heaviness of the upper part of the painting. Adding two leaves drawn simply, just their basic lines to balance the whole composition.

And here's the final spread, I use a small ceramic paint when I'm painting using gouache. Experiment with your own colors and mixtures, the art of color-mixing is a good skill to master.

Another video from Theodora, this time a step by step tutorial on how to paint different tropical leaves using various mediums - gouache, acrylic, and watercolor.
The Warm and Vibrant Tropical Color Palette
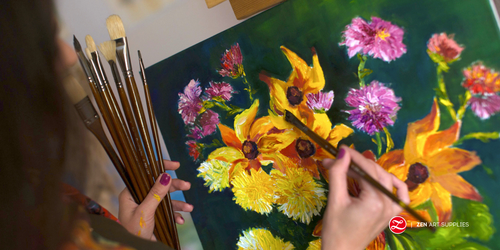
For this final tropical palette, I used acrylic. Yes, you got that right - all mediums used are all water media! And there's nothing better than a tropical climate thriving flower like the bird-of-paradise (also called the crane flower) to represent this warm and vibrant palette collection. A cascade of colors in one flower - orange, red, violet, and green - and their varying color gradations in between. I've always been amazed ever since I first encountered this plant that sprouts flowers that look like colorful birds.
This is the reference photo I chose for this color palette. And I painted the background a warm-ish blue to perfectly complement the bright orange of the flower.


I find that it's much easier for me to build up on my layers when I start my canvas out with a wash of color for an underpainting. The starkness of a white canvas can be too overwhelming at times. I used a thinned down mixture of Yellow Ochre and roughly applied it to the whole surface. This color is perfect for that first warm undertone for the flower and to temper the brightness of the blue background later on. The perfect bright tropical color palette!
If the subject I'm painting is not too difficult, I just sketch it out using one of my charcoal pencils. But if there's too many details to cover, I would use a thinned down acrylic paint to do the sketching. My working process usually starts by tackling the most difficult parts first, in this case the petals of the flower. I used Cadmium Red and Cadmium Yellow Medium in varying ratios to get different orange mixtures.

You can paint continuously (alla prima) without waiting for layers to dry if you work fast. Keep in mind that acrylic dries quickly and might prove challenging. This technique is more suitable for oil painting. Though layering and color mixing are pretty similar between them both. To learn more about the difference between the two, drop by our acrylic vs oil paint article. I tend to work in layers when I use acrylic paint. I start with the midtones and blend the shadows in, then add the lighter parts last.
Unlike watercolor painting where you work from light to dark, acrylic calls for the opposite. You start with the darker colors and tones and work towards the lightest for last.
After I finished painting the orange petals, I worked on the violet ones next using a mix of Cadmium Red and Cobalt Blue. Red is a strong color when color mixing, so slowly add in small increments to your mixture. I used Titanium White to lighten some parts as seen in the reference photo.

Then I worked on the stem and leaves, first mixing Sap Green and Cadmium Yellow Medium to get a warmer midtone green. I just add more yellow for the lighter parts and use Hooker's Green Hue for the shadows and darker parts. To get the textured look and feel, I used the dry brush technique. Cadmium Red was used to add the red part, and dry brushing white, red, and green across each other to create that beautiful texture. For brown, I mixed Cadmium Red and Sap Green. All complimentary colors when mixed together will give you various browns. Try it out for yourself to see the different browns you get depending on the colors you mix.
And here's the finished painting after adding the blue background as the final step. I used a mixture of Cobalt Blue and Titanium White, for a somewhat lighter and much brighter blue color that's in line with the warm tropical color palette I'm looking for.

Here's a closer look at this fabulous color palette. We can now better appreciate the fiery color of the orange against the bright blue background. There are so many eye-popping colored tropical flowers - bougainvilleas, orchids, and hibiscuses are just some that come to mind.

I hope these three palettes will inspire you to create your own versions. And to conceptualize your very own take on the tropical color palettes. I'm sure you have so many ideas waiting to be explored. Remember to paint according to your own style and preference. Don't feel pressured to paint in so much detail as I did, we all have our own way of doing things. Now go and bring that tropical vibe to your home no matter the season or climate you're in!
Which tropical palette resonates with you the most? Have you thought of your own version of a tropical palette? Which medium are you looking to use or explore? What future content would you like to see from us? Let me know in the comments below, and I'll happily get back to you. Join our friendly art community Painting Inspiration Daily on Facebook. You can share your art and ideas, watch LIVE tutorials, and be inspired to paint!
Next on our Toolkits, I'll cover the basics of Sketching Techniques for Beginners. From the basic materials to easy step by step guides. Until then, have a great tropical painting time!
- MEET THE AUTHOR-

Kathleen is the Wordsmith at ZenART, resident artist and art editor. When God sent a shower of talents, Kathleen made sure she got a basketful of them! She's a visual artist with practical knowledge on various fields from painting and sculpture, to costume and set design which comes in very handy when writing about various art techniques and theories. She also shares her passion for the arts through teaching. She runs her own brand of handmade wirework jewelry designs.


