Understanding the Basic Structure of the Cat | Quick Sketching Cats in Motion | Cat Face Sketch Easy
Cats are one of the most popular animal subjects people love to draw or paint. And no wonder, they just seem so enigmatic and graceful to me no matter the pose. And of course, they’re awfully cute, too. So let’s tackle how to draw a cat so you can get to paint a clowder of them if you want to!
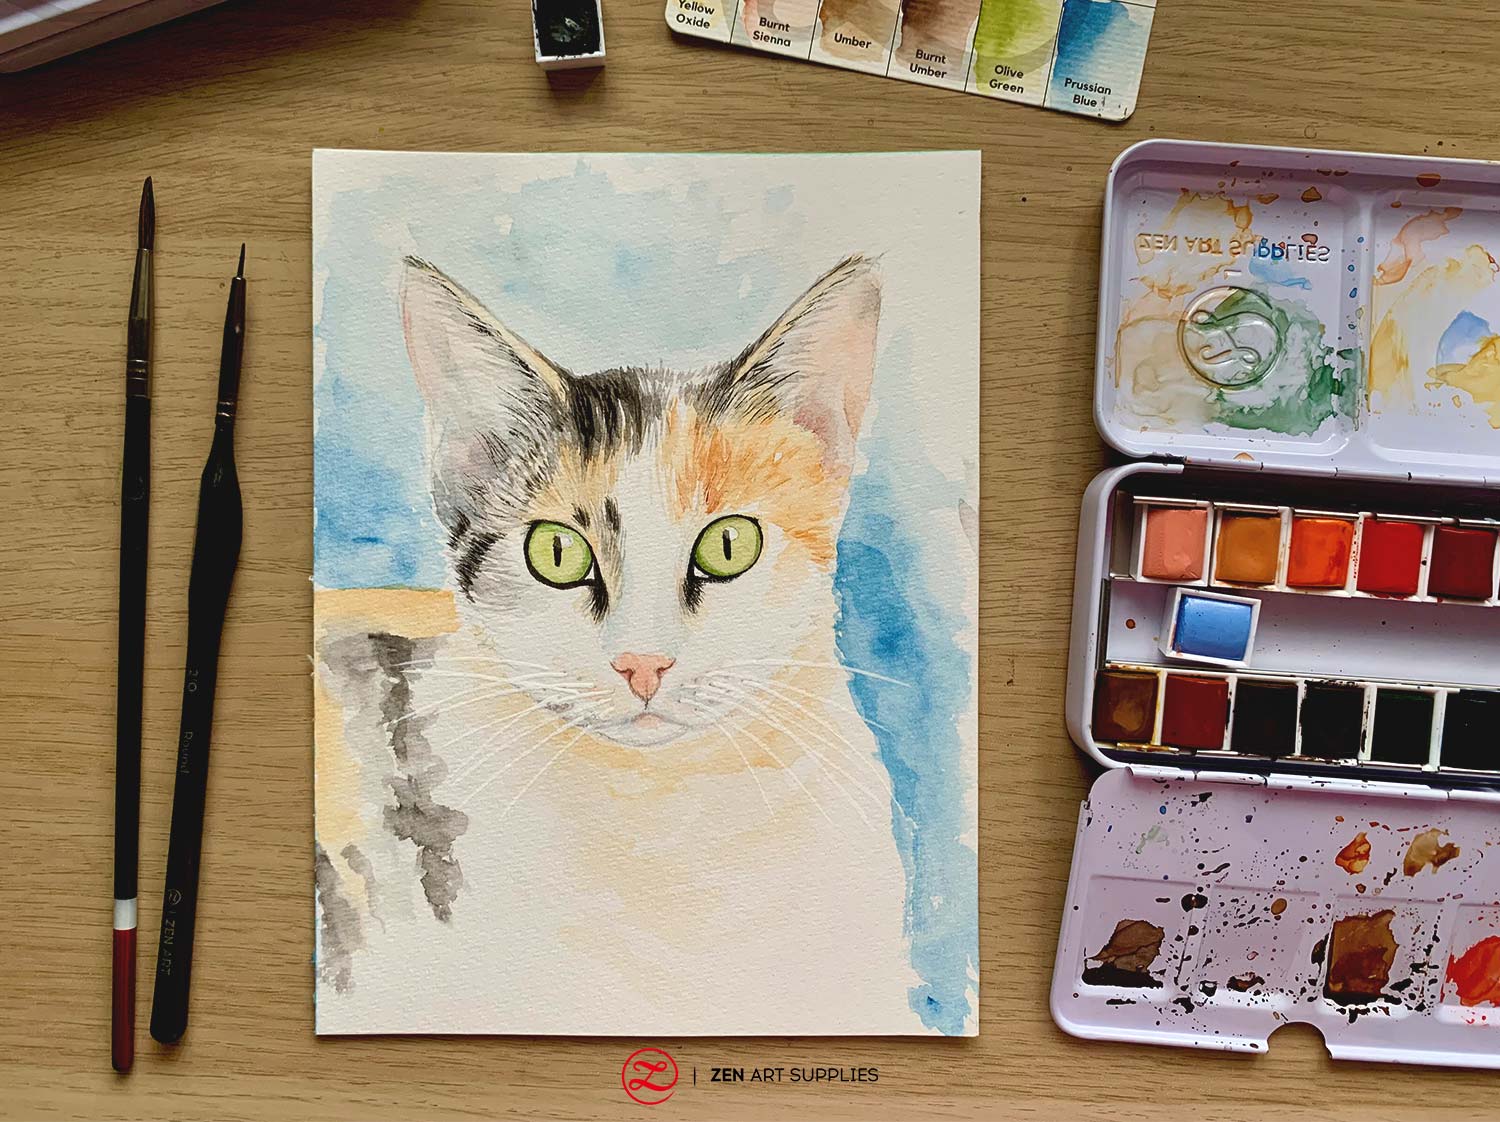
Watercolor of a cat's face painted using colors from the Sorriso Palette on a 6x8 in cold-pressed watercolor paper cut from a sheet of a bigger Watercolor Pad (12x16 in). Brushes used are #5 Round brush from the Turner Collection and a 0/2 Round brush from the Fine Line brush set. All from ZenART Supplies.
Cats are much simpler because their basic structure is generally the same across many cats. Whether they’re domesticated house cats or wild cats, big or small, you’ll be able to use the same process to draw them all. Even their movements are very similar to each other.
Cat Sketch - Understanding the Basic Structure of the Cat
Cats’ bodies are longer than they are taller. Drawing a relaxed standing cat will help you visualize this and here’s a photo of a beautiful grey Egyptian Mau cat that’s perfect for this exercise.

Step 1 - Start with a rectangle or square and divide in half
Nothing can be simpler than starting with a simple geometric shape, it will be a square or a rectangle that’s almost square! Then, draw a horizontal line across the center dividing it equally.

Step 2 - Split, extend, and add a triangular shape
Split the top half into two again and extend the outline a little bit beyond the original rectangle. A cat’s shoulder’s point (and many other animals as well) lines up with the middle dividing line that we just previously drew across the body. It extends out from the body, is very visible, and is right above the front toes below when in a full standing position with the front feet together. This is the knob at the end of the humerus bone that connects to the shoulder.
Step 3 - Add the limbs
The shape of the legs are in a zig-zag form - more obvious for the back legs than the front legs when the cat is standing still. But with the cat that we’re studying for this exercise, one front leg is bent and in mid-step while the other is straight and firmly touching the ground. The legs nearest to us are drawn in yellow below while the ones away from us are in red.
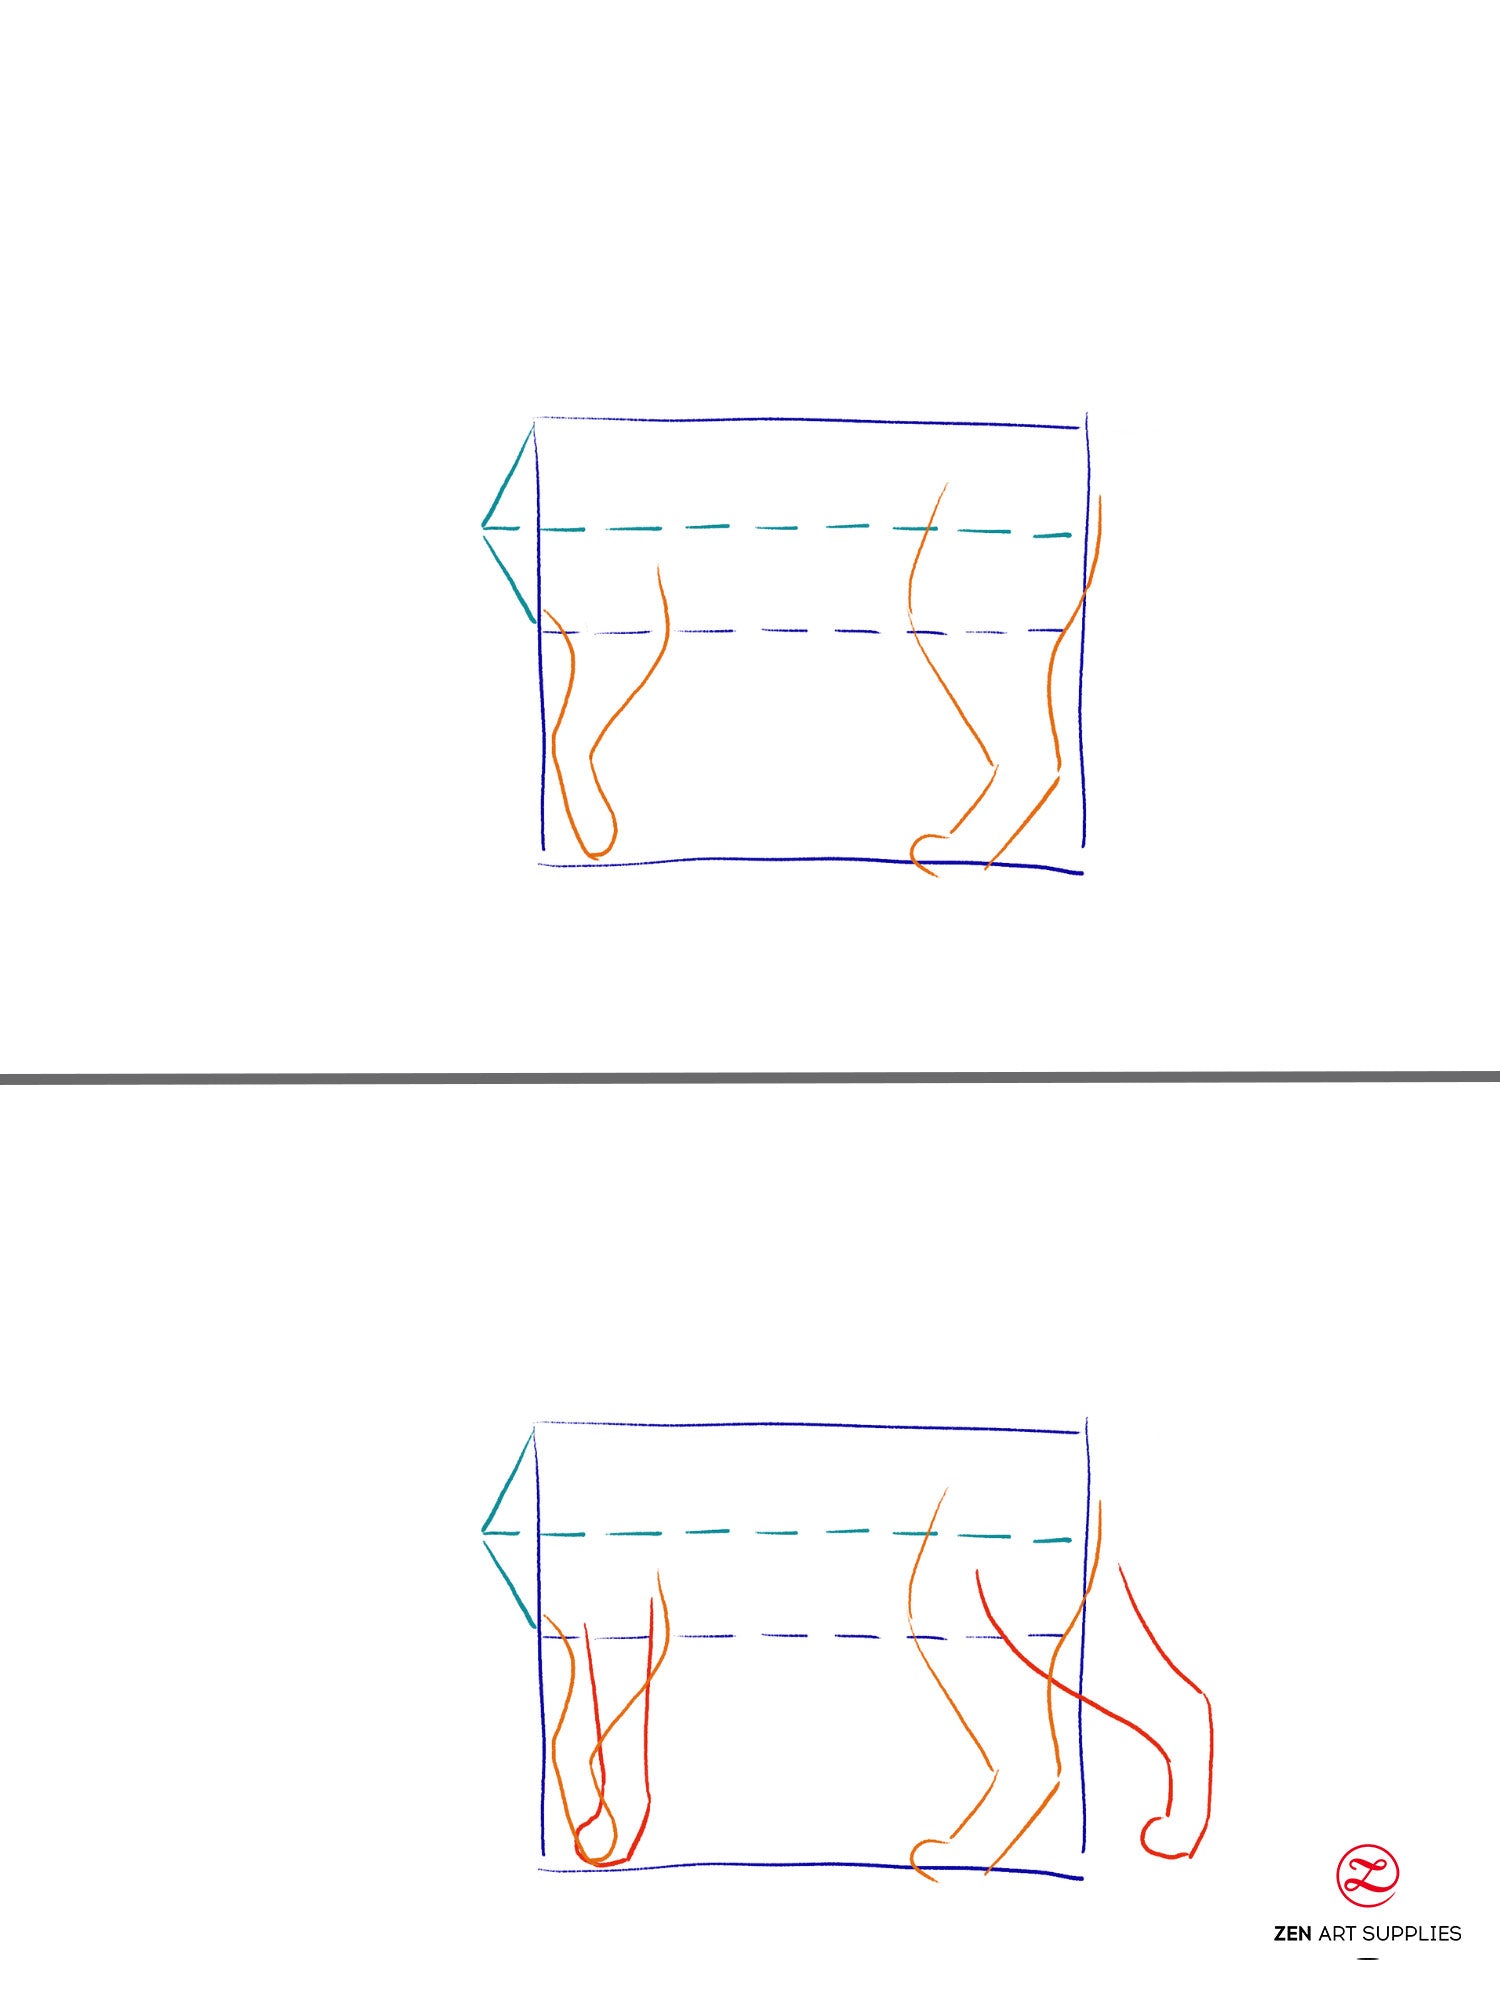
Step 4 - Neck, head, and tail
For the neck, imagine a cylindrical shape that tapers slightly as it connects to the base of the head. Depending on whether the head is facing forward, at an angle downward, or even fully down - simply adjust the direction of the neck. Start from the tip of the triangle where the shoulder point is. Below you’ll see two different head positions to help you better understand this. Then, add the ears and the basic head shape. Finally, add the tail and just like the head, adjust the position as needed.

Step 5 - Finalize the cat drawing
Now, you can start refining using the guide lines and shapes that you created. Connect and trace the different parts together to create a whole. Add the eye, the actual shape of the ears, the nose, the softly rounded paws, and the whiskers, too!
Draw lightly so that you can easily adjust and render in the areas where the fur is longer and more visible in fine linear strokes.
Here’s the line drawing overlapped with the photo so you can see how it was broken down into the step-by-step guide.

Quick Sketch of Cats in Motion
But what about cats that are in more obvious motion? Here’s another step-by-step guide on how you can draw them easily and more accurately.
Let’s start with a simple walking motion. And let’s strip the cat down to its skeleton to see the most basic. Here’s what we’ll be working with:

Step 1 - Mark where the head and ribcage are
Start by identifying the head — space-wise on your sketchbook or paper — and the position it holds. Use a circle and a conical shape together to create the basic head shape. Then, add the ribcage. Keep in mind its distance from the head is not too far.

Step 2 - Add the spine
Next, draw in the shape of the spine. This will easily change depending on the cat’s position. But for this exercise, it’s a very long S-shape that starts from the base of the head to the base of the tail. Adding the shape of the spine helps a lot in visualizing the form of the cat for various positions.

Step 3 - Filling in the limbs and joints
I use the same technique for quickly sketching people as well. Lines for the bones and small circles for the joints. This can be easily adjusted into any position, just follow the angle of the limbs as needed. I started with a slightly bigger circle for the shoulder point and the hips which will be where the limbs will spring from.

Step 4 - Final details
Lastly, mark the neck’s girth and add the tail. From here you can start piecing your various pieces together and finalize your simple cat sketch or drawing.

Here are a few quick sketches of cats in motion that I did in my B5 Artist’s Sketchbook using the techniques I shared with you above.
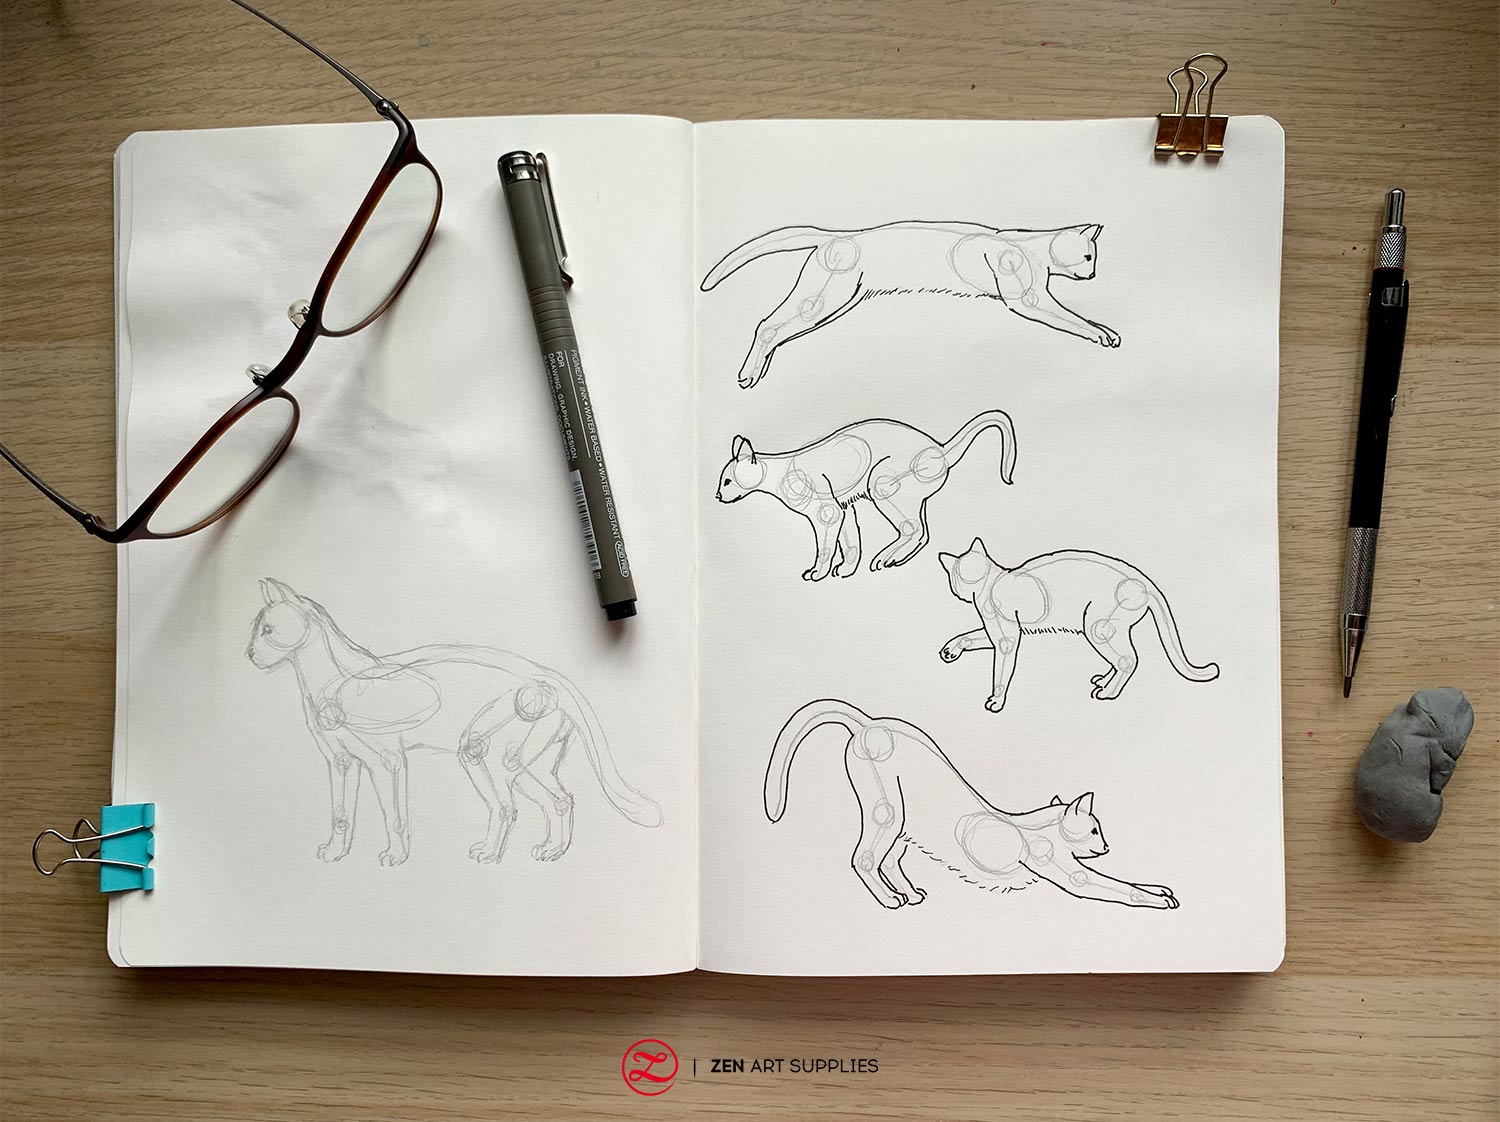
Quick sketches of cats in motion on my B5 Artist’s Sketchbook. I first plotted out their positions and rough sketched the full form, then used a 0.5 drawing pen to finalize the drawing.
Cat Face Sketch Easy
Now that we’ve gone through the step of how to draw a cat’s body, let’s dive into the face next.
Here’s a perfect reference to use as the cat’s face is looking head-on straight at us.

Step 1 - Basic head shape and proportion guide lines
Start by drawing an oval shape, not too long of an oval mind you (1). Then, divide it into four equal parts using a cross-section (2).
Divide the bottom section into three equal parts, I used two short lines to quickly mark them (3). Using the upper short line as a guide, add another smaller oval shape that ends a little below the bigger oval shape (4). This will be the cat’s snout area.

Step 2 - Adding the facial features
Draw two arches above the middle horizontal line that taper and lead downwards towards the lower short line (5). They will be the upper lines of the eyes. Next, add the lower lines of the eyes. Start with V-shapes for the inner corners and curve them upwards to connect to the ends of the previously drawn arches.
Don’t forget to add the pupils, how small or big they are will depend on the lighting conditions and their moods (6). The eyes should come out almond-shaped and tilted at an angle with the outer corners higher than the inner. For a successful cat sketch, eyes are a big portion of the final look. So, take your time and try to get them as right as you can.

Draw the nose right under the bottom short blue line (7). Here’s a close-up of the step-by-step of drawing the cat’s nose. Two low connecting hills for the top (red), a V-shape with curling ends (orange), a vertical line that divides the tip of the V, and shadowing for the nostrils.

Finally, add the upper mouth opening using two connecting wide U-shapes (8). Use the bottom point of the nose as the starting point and curve downwards below the bigger oval but still within the smaller oval.
Step 3 - Whiskers and ears
Use the section where the middle line (turquoise) intersects the inner arches of the eyes as the starting point. Imagine a line curving upwards and outwards. They will guide you to the ear placements and the curves (9). Then, add the outer areas of the ears. Observe that this will not be one straight line, the bottom parts of the ears have small pockets (10).

Add tiny dots, they are the roots of the whiskers (11). These are fairly visible even with long-haired cats. But make sure not to draw them too dark unless the cat you’re trying to draw has really dark spots.
Now you can add the whiskers springing forth from the spots you’ve already got in place. Most cats will have 12 whiskers on each cheek, usually placed four in a row.
Step 4 - Adding the hair for the final cat face sketch
Below are four different ways of adding the halo of hair/fur around a cat’s face.
Cats with no hair will have quite visible cheekbones and jawlines. Short-haired ones will have short hair following the two oval shapes and fur on the ears. Cats with medium hair will have them a little outside the oval shapes and also fur on the ears. A bit fluffier top-of-head hair as well. And for long-haired cats, imagine a beard springing from the ovals shapes. Longer ear and head hair, too.

And that’s how you can do a cat face sketch quite easily. If you’re drawing a kitten, the eyes will be bigger and much rounder, and the snout much shorter.
Here’s the quick final sketch I made using the cat in the reference photo shown above.

And here’s a close-up of the watercolor version of it that I painted. I made use of my 0/2 Round brush from the Fine Line set to paint in very fine strokes to suggest hair, and for the long and ultra-thin whiskers as well. You can use masking fluid to preserve the whiteness of the paper for the whiskers. Or like me, you can use white gouache and paint it on top of the other finished layers as a final step.

I hope you found this step-by-step guide on how to draw a cat helpful and easy to follow. Just keep drawing them and you’ll find yourself getting better and better at simplifying and breaking down their forms. Remember, anything that seems too complicated can always be broken down into smaller and simpler parts.
We’d love to hear back from you!
Have you tried drawing a cat before? What do you find harder to draw, the body or the face? What other animals would you like to learn how to draw? I would love to hear your thoughts, so do let me know in the comments below! Join our friendly art community Painting Inspiration Daily on Facebook. You can share your art and ideas, watch LIVE tutorials, and be inspired to paint!
Meanwhile, have fun with your cat sketches, drawings, and paintings!
- MEET THE AUTHOR -

Kathleen is the Wordsmith at ZenART, resident artist and art editor. When God sent a shower of talents, Kathleen made sure she got a basketful of them! She's a visual artist with practical knowledge on various fields from painting and sculpture, to costume and set design which comes in very handy when writing about various art techniques and theories. She also shares her passion for the arts through teaching. She runs her own brand of handmade wirework jewelry designs.


