Different Types of Charcoal | Essential Charcoal Drawing Supplies | Charcoal Figure Drawing Video Tutorial | Charcoal Drawing Ideas
Drawing is the most essential skill that any artist should possess and continue to hone. And it makes it even easier to do so because all you really need is a pencil and your paper to start off. As a child, I started drawing with my school pencils and used them from basic sketching to more complex shading later on. But I felt limited and always wondered how the other drawings I saw achieved their darkest darks. The not so secret answer was they were charcoal drawings, of course.
I was about 12 when I was introduced to the 6B graphite pencil and needless to say, I loved it so much! A few months later, I started exploring sketching and drawing with charcoal. And it was a whole new experience yet again. I can even go darker and now I can blend using different tools.
Graduating from the basic school pencil to charcoal was a very rewarding experience.
What is meant by charcoal drawing?
A charcoal drawing is a drawing made using charcoal as the medium, usually applied on paper as the surface. Charcoal can be bought in various kinds, forms, and hardness. There are also various ways of using them, either on their own or with the help of other drawing implements.
Is charcoal good for sketching?
Yes, it definitely is. Charcoal lends well to expressive strokes and applications. Since charcoal is on the powdery side, similar to chalk pastels, I find it especially useful for doing easy smudging techniques here and there even with just my bare fingers. The softer willow and vine charcoal is especially suitable for quick sketching.
Before I discuss the techniques, let me go through the types of charcoal and the tools you need for drawing in charcoal. Knowing these will help you better understand and use the techniques that I’ll be showing later.
What are the different types of charcoal?

Willow and Vine charcoal
Willow and vine charcoal are on the softer side and can easily snap or be crushed if you apply too much pressure on them. They look like long and thin sticks and are very light that if you blow hard enough, your stick will roll off your table.
Being very soft and light, they are perfect for those quick charcoal drawings or sketching. For more detailed works, they are best used for lighter applications. It will be very difficult to get a deep, dark shade using them.
Compressed charcoal
Compressed charcoal is powdered charcoal that has been compressed into round or square sticks by mixing the powder with a gum binder. The hardness will depend on the amount of binder used. This is the kind of charcoal used in charcoal pencils.
Because this type can be very hard, it’s quite useful for drawing in fine details. Especially with the pencil ones, that you can really sharpen to as fine a point as you want to.
Powdered charcoal
Powdered charcoal is exactly its name – in a fine powder form. It’s perfect for soft, subtle layering. You can use it to cover large areas of your surface for a light tone, then use erasers to lift off the charcoal in the areas where you want highlights. To apply it, you will need to use a paintbrush or a piece of cloth. This comes in a container and can be quite expensive.
*You’ll also find tinted charcoal available in pencil and compressed stick forms, and powder form. And I just recently discovered that there’s also a paint palette option, but I haven't had the chance to try it out yet.
Quick comparisons between the different kinds of charcoal
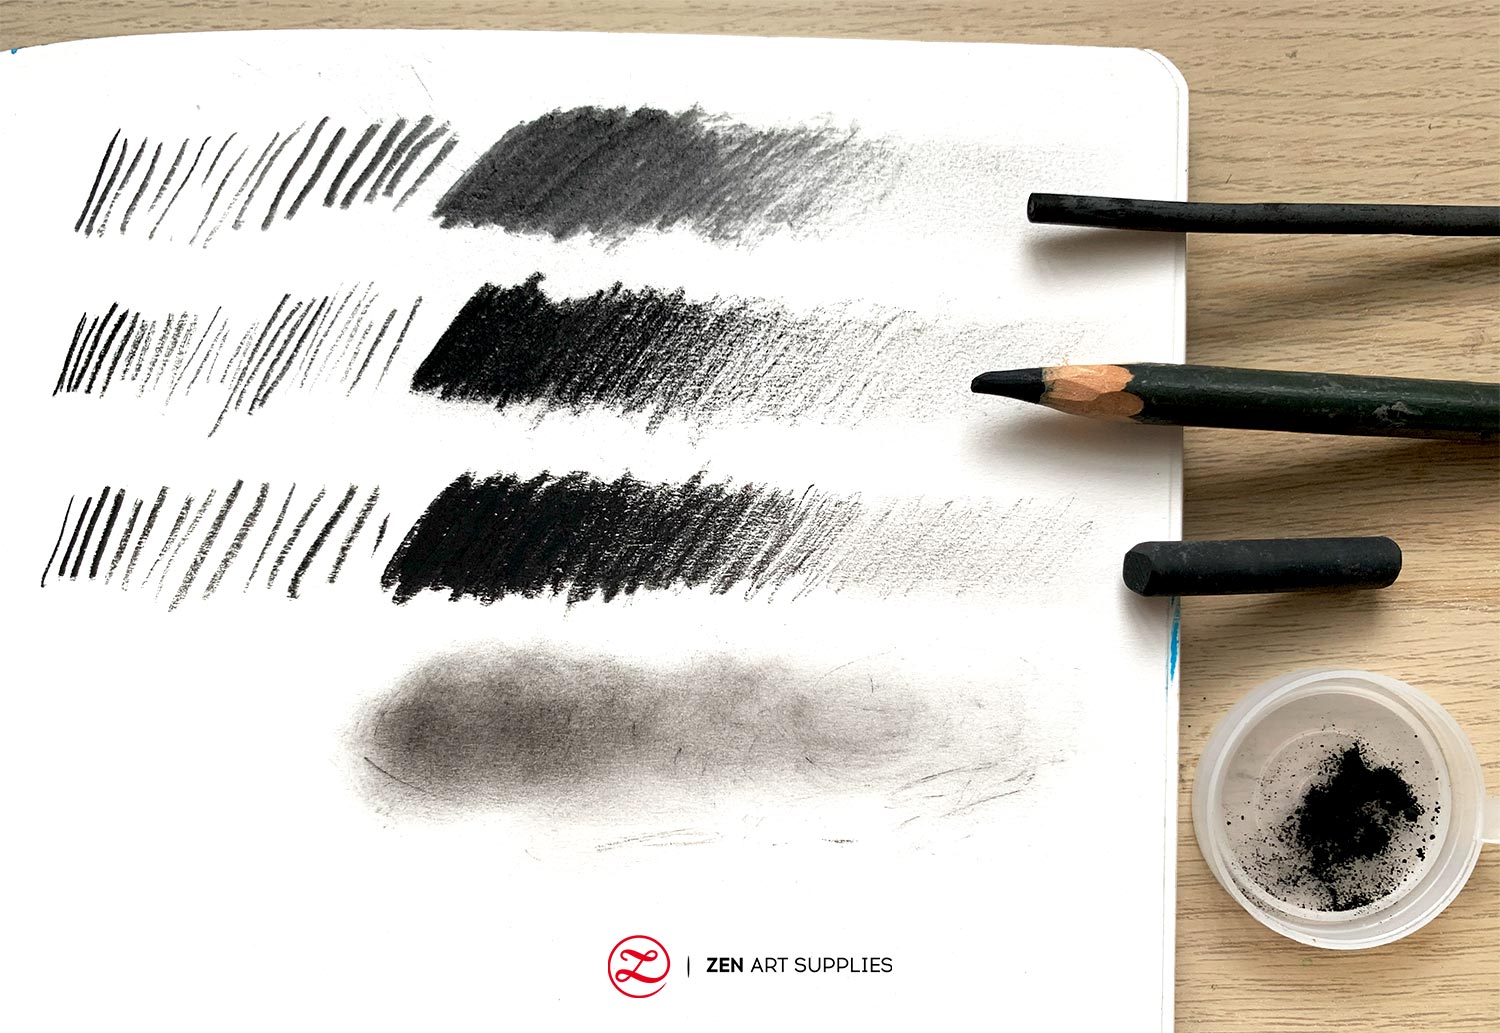
Here they are applied on ZenART’s B5 Artist’s Sketchbook, side by side for a quick comparison.
Vine charcoal glides very easily and smoothly across the paper, the texture it leaves behind is also on the softer side. But as you can see, the darkest it can go is a deep gray. It’s perfect for mid-dark to very light values. No matter how hard you press you won’t be able to accidentally do dark shading.
The compressed charcoal in pencil form and chunky round stick gives you the blackest of blacks. It can also be rendered, blended, or smudged into the lighter values. Because they are harder than the willow and vine sticks, you can sharpen them to fine points or edges in the case of the round stick. Which then allows you to draw in fine details and textures as darkly or lightly as you want.
With powdered charcoal, the application is obviously quite limited. But it’ll give you the smoothest of all applications if that’s what you need or are going for. It’s all a matter of preference at this point. Personally, I hardly use this as I prefer to draw more textured charcoal drawings with visible strokes.
What are the other charcoal drawing supplies?
Paper - first and foremost!
The most commonly used support for charcoal is paper - toothy and thick paper is best. Charcoal needs a textured enough surface to adhere to and a thick enough paper that will take in several layers of charcoal. Good thick paper ensures that it won’t easily tear no matter the amount of pressure you apply. A sketchbook with thick enough paper is also good to have around for quick sketching and for doing studies.
The fun part is that there’s also toned paper if you want to explore working on paper that’s not white or ivory-colored. They are available in sheets or pad form. Below are just some of the colors that you can play around with, you’ll also find ones in earthen tones. The ones I most often use are white, cream, bluish gray, and black.

A Spotty Grey B6 Artist’s Sketchbook on top of an open B5 Artist’s Sketchbook, on top of multi-toned watercolor sheets.
Here’s a close-up of the texture, this paper is suitable for pastels, inks, and watercolor as well. This is the kind of paper and texture that I prefer to use for charcoal drawings. Many artists like using watercolor paper because of its thickness and texture.

Leftmost is ZenART’s B5 Artist’s Sketchbook, it looks much smoother next to the watercolor paper but actually has just the right amount of tooth for the quick charcoal drawing ideas that you want to record.
Watercolor pads are also quite convenient to have as you can easily bring them along with you if you want to use thicker and more textured paper compared to sketchpad paper.
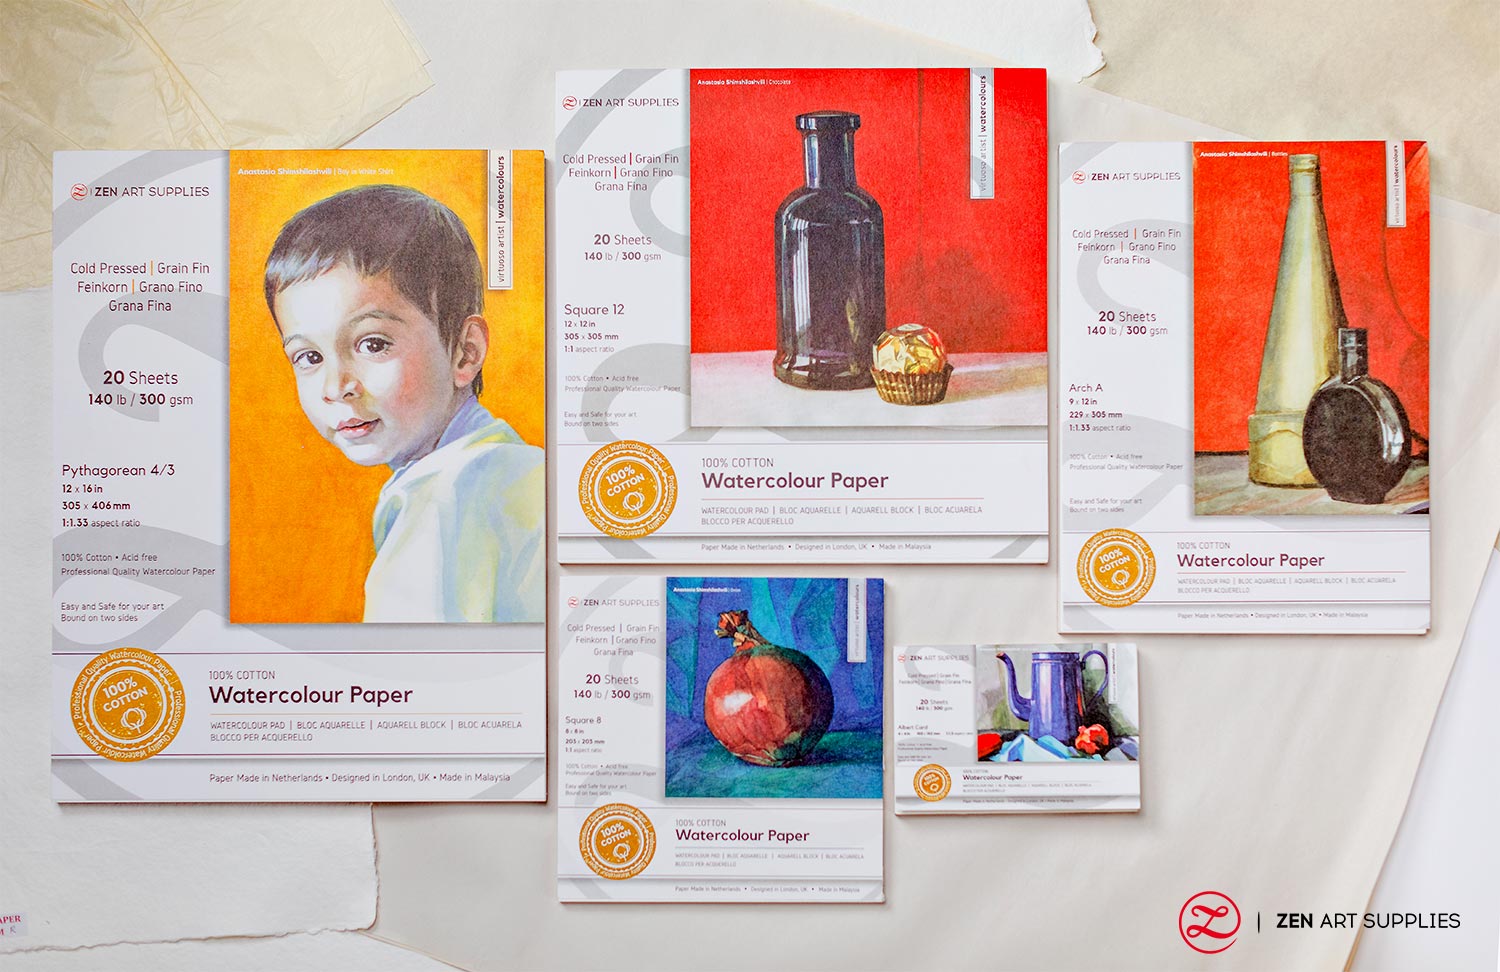
ZenART’s watercolor pads/blocks in various sizes. They’re all made with 100% cotton, cold-pressed, and acid-free paper. Each pad comes with 20 sheets.
Other tools that will help with your charcoal drawing process:
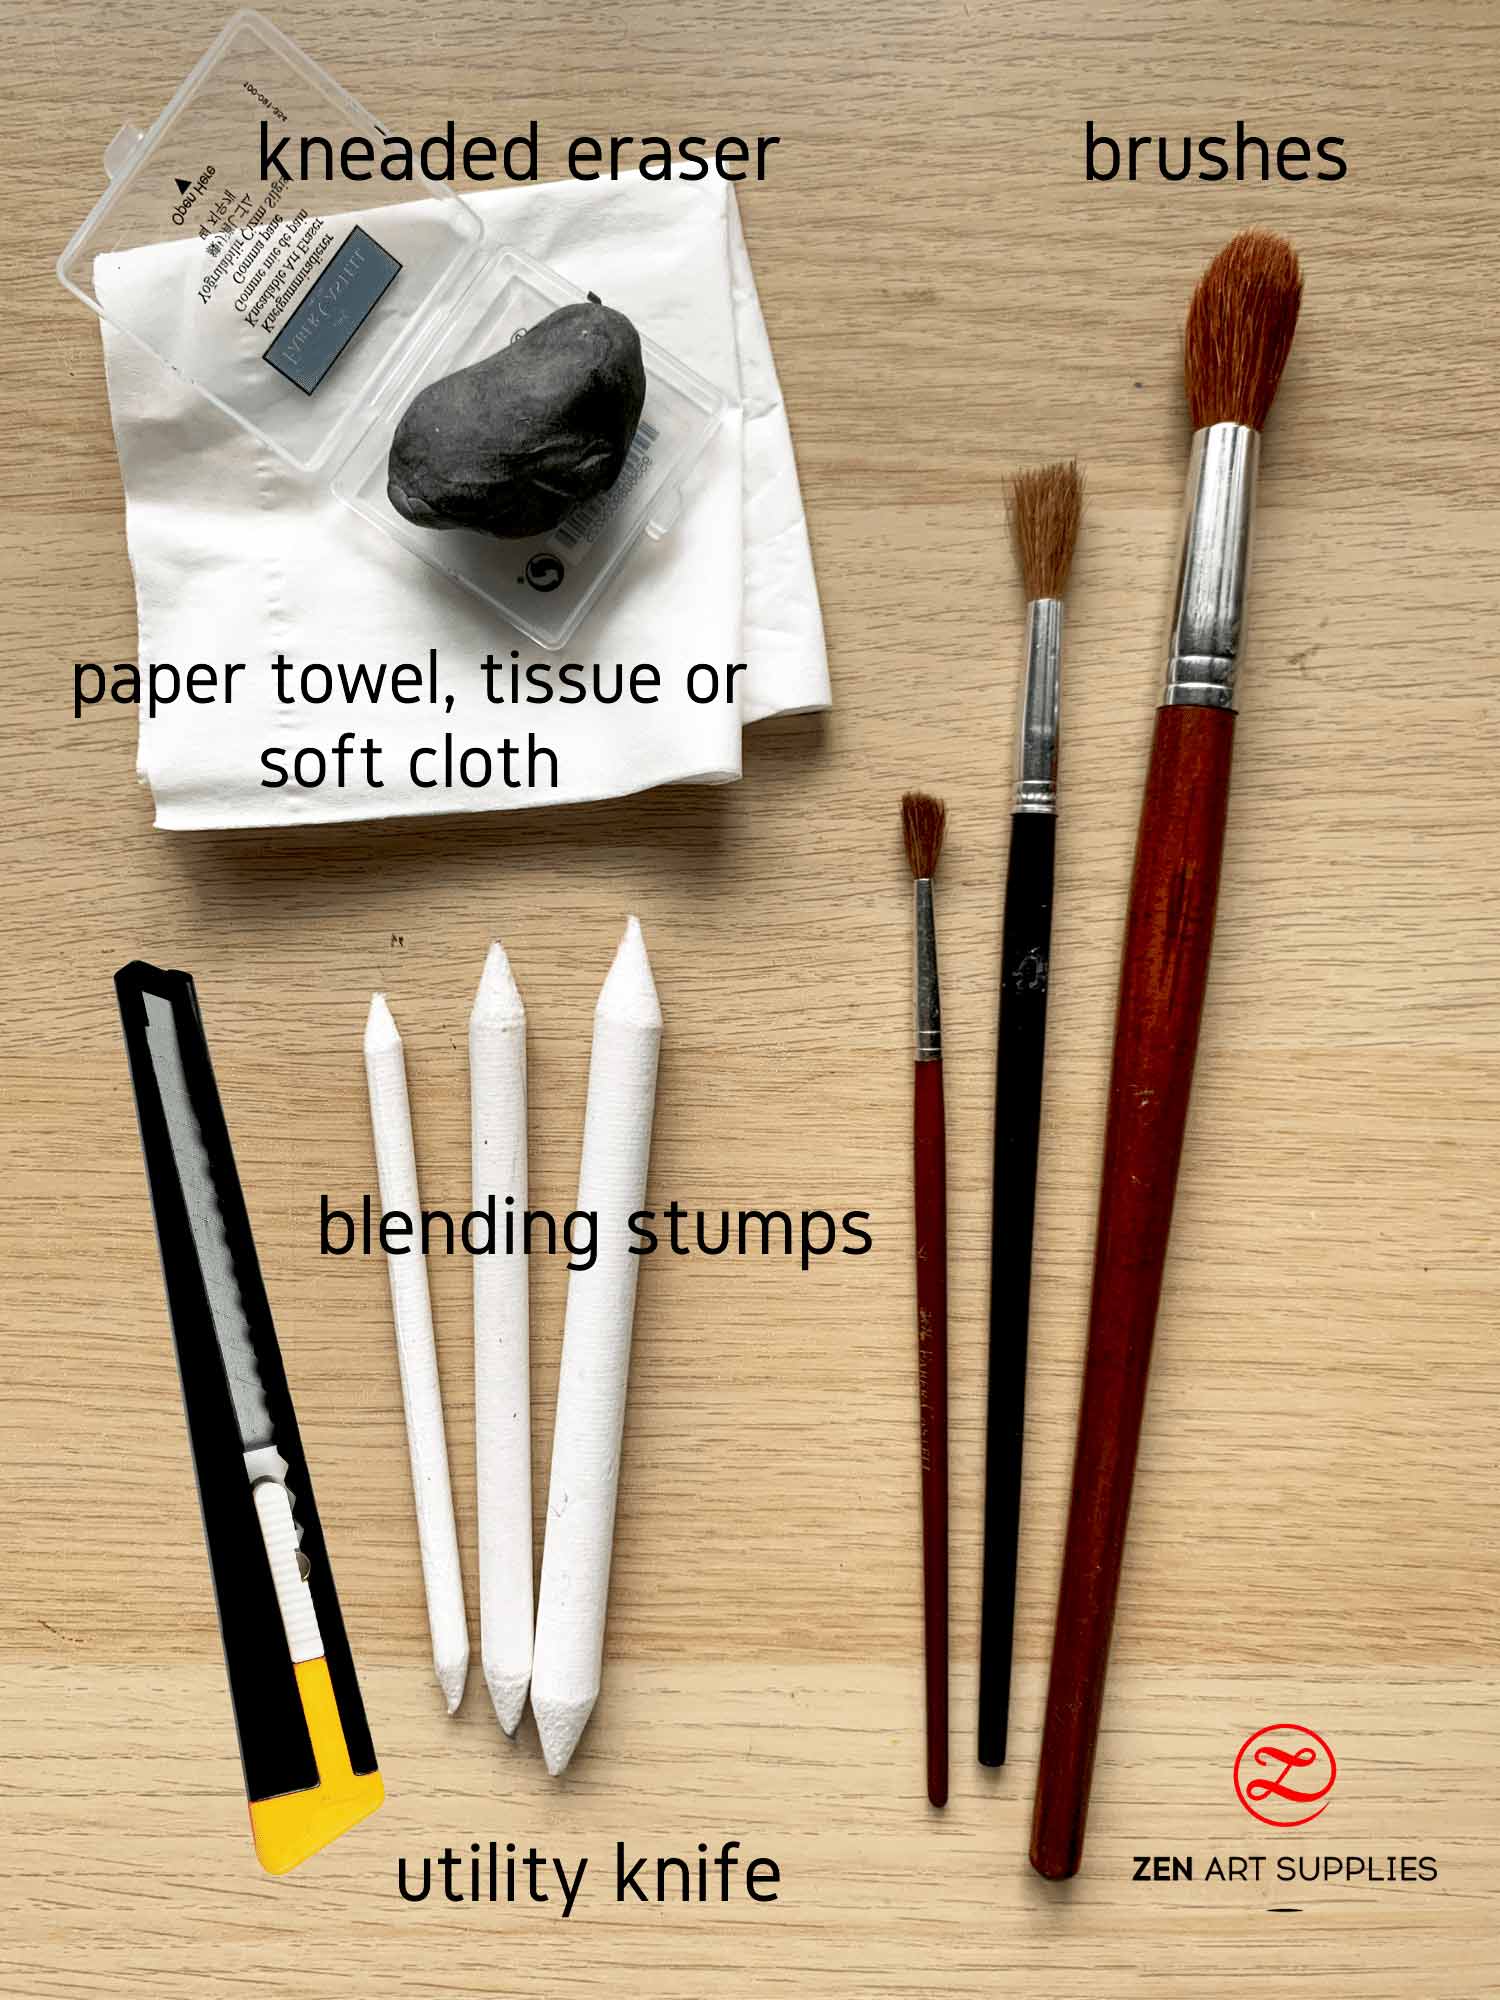
Kneaded eraser and white eraser
Of the two, the kneaded eraser is the must-have and is quite indispensable when creating charcoal drawings. I use it for subtracting charcoal from the surface, for lightening a too dark rendering and for easily creating highlights. And of course, for a fantastic clean up when needed.
The nice thing about a kneaded eraser is that it’s malleable like clay. But because it’s basically a rubber putty, it stretches and can be molded into any shape you want. I find myself therapeutically kneading it when drawing. Just stretch and knead it around to distribute the lifted charcoal to the whole eraser.
White vinyl or synthetic rubber erasers are great for any hard erasing and lifting you need to do. Just be careful as it can also accidentally smudge areas that you don’t mean to be so.
Blending stumps or Tortillons
I’m sure you’ve seen them around, they’re white, round stumps with pointed tips and are usually made of rolled paper. A handy bunch to have around if you don’t like getting your fingers dirty by using them for blending. Use the stumps instead to blend out the marks you make with charcoal for soft textural effects.
You can also use them for pastels, pencils, and other drawing tools that are blendable. They come in a variety of sizes which is awesome. Whether you like to work with big or small charcoal drawings, you’re sure to find the sizes you need.
You can clean them by using your kneaded eraser or by ‘sharpening’ it across a sandpaper block.
Paper towel or cloth (chamois cloth)
This is another way of blending charcoal if you don’t want to dirty your hand. Just like the blending stump, use it to blend areas where you want to soften your charcoal marks. Simply wash it in warm, soapy water when it becomes too dirty to keep it nice and soft.
I just use a paper towel. But other artists prefer to use a chamois cloth (chamois leather) as it blends softly and subtly depending on how you use it. It also won’t leave any unwanted smudge marks that sometimes happen when using your fingers.
Utility knife
You’ll need to sharpen your charcoal — especially the pencils — every so often. A utility knife is best for this as you can control the length of the tip and how sharp you want it to be or not. You can also use it to shave off some charcoal from your compressed sticks if you need some powdered charcoal and don’t have store-bought ones around.
Fixative
The thing about charcoal drawings is that they can be messy and they can be easily smudged. To avoid this, you can spray your work with a fixative. There are two kinds: a workable fixative and a permanent fixative. Workable means you can still work over the top of the sprayed layer of fixative. Meanwhile, permanent fixatives should only be used at the very end, much like adding varnish on a finished painting. Only apply this type if you’re absolutely sure you’re done with your drawing.
You don’t need to have all the different kinds of charcoal to start studying how to use it. When we learned it in school, we just used charcoal pencils. Then I eventually added compressed charcoal sticks to my kit for quicker and easier coverage over large areas when we started drawing bigger works. You can start with a pencil and start small, too.
And now you’re well prepared to take on the basic charcoal drawing techniques!
How do you start a charcoal drawing?
Just like when using a regular pencil, you start by sketching your main details in. You can plot out the main value changes with lightly sketched lines for added guidance. Below is a great place to start to familiarize yourself with the characteristics of charcoal.
Charcoal Drawing for Beginners
Start by drawing a sphere, since it’s just a basic form, this will allow you to focus on getting the values right first and foremost. And the techniques you need to use to accomplish this.
First lightly sketch out the circle shape and the cast shadow. You don’t need to sketch much with this one.

Start with the mid values and work your way towards the darkest and the lightest, blending and layering where needed. It’s always much easier to add than to have to remove a much too dark application.
For the lighter values, lightly go over the area with your pencil and then softly smudge it with your preferred tool.

Keep layering and smudging until you reach the desired values. I like to lightly go over the smudge areas with my pencil to add a subtle texture — that’s my own preferred way of doing things. If you want to keep it all smooth, then just leave it at that blended stage.

Leave the darkest areas for when you’re certain of how dark you need to go. It’s quite hard to erase heavily applied and very dark charcoal markings. And your charcoal drawing will look dirty or messy if that happens.
Graphite pencils or pens are much harder which allows techniques such as stippling, hatching, and cross-hatching to be much finer when using them for shading or textural effects. Charcoal, being on the softer side, makes it more challenging to use those techniques. And the sharpness of your charcoal's tip will make a difference on the kinds of marks it'll make. You'll still be able to do them, don't worry! The effect is just very different. The easiest way to use charcoal is to blend, layer, and redact it.
If you found that too easy, then this next one might be more up your alley!
Charcoal Figure Drawing
I’ve chosen a photo of a woman’s back with dramatic lighting for a nice contrast between the lightest and darkest values. Choosing subjects with a good range of values makes it easier to achieve very compelling results.

Just like with the sphere above, start by sketching out the form. Then identify the major value changes or differences, already marking where they are making for an easier workflow.
Start with the midtones just like before and again work your way towards the lightest and the darkest values. Work in sections so you don’t feel overwhelmed. Once you’ve added the darkest areas, you’ll be able to adjust all the other values if needed.
Here’s a time-lapse video of my charcoal drawing process so you can better understand my working flow:
You can find the reference photo I used here, if you’d like to give it a try. And here’s the final work:

Drawn on a 9 x 12 inch Watercolor pad/block from ZenART Supplies.
Charcoal Drawing Ideas To Inspire You
Here are a few that I hope will encourage you to draw with charcoal. There are so many subjects waiting for you to draw and explore. Something as simple as an egg can be quite interesting when properly lit and placed in a good composition.
Scenic Views
“A Zandmennik house” by Vincent Van Gogh, 1879, charcoal on paper.

Why not draw cityscapes or landscapes? Or the view outside your window. It doesn’t need to be super detailed or hyper-realistic. Focus on the values and how they play against each other.
Animal Charcoal Drawings
“An Elephant” by Rembrandt, 1637, charcoal on paper.

Animals also make for great drawing subjects, you can be more rough and visibly linear with your renderings just like Rembrandts’. This will help add texture or suggest movement to your animal drawings.
Dramatic Charcoal Portraits
“Portrait of an Italian” by Edgar Degas, 1856, charcoal.

Charcoal is perfect for creating dramatic monochromatic portraits. You can really create a wonderful drawing by choosing to bathe your subject in dramatic lighting that’ll give you wonderful high-contrast values.
Remember, just keep drawing and practicing. The more often you do it, the more progress you’ll see in your charcoal drawing techniques. And all you need are just a few supplies to get starting! And don’t be afraid to get messy, drawing with charcoal is one beautiful mess of an experience.
If you’re looking to draw some portraits in charcoal but need more guidance with the proportions and such, check out our How To Draw a Basic Portrait and How To Draw ¾ View Face articles. You’ll find step-by-step guides to help you out.

We’d love to hear from you!
Have you tried drawing with charcoal before? What did you find was the most challenging aspect of it? If it’s your first try, what are you thinking of drawing for your first time? Looking for a topic that we haven’t covered yet? Let me know in the comments below, I’m always looking forward to hearing back from you.
Join our friendly art community Painting Inspiration Daily on Facebook. You can share your art and ideas, watch LIVE tutorials, and be inspired to paint!
Have a fun drawing time!
- MEET THE AUTHOR -

Kathleen is the Wordsmith at ZenART, resident artist and art editor. When God sent a shower of talents, Kathleen made sure she got a basketful of them! She's a visual artist with practical knowledge on various fields from painting and sculpture, to costume and set design which comes in very handy when writing about various art techniques and theories. She also shares her passion for the arts through teaching. She runs her own brand of handmade wirework jewelry designs.


