Step by Step Guide To Portrait Drawing | How To Draw A Face | How to Draw Facial Features | Tips and Tricks
After learning the basics of portrait drawing here, you might also be interested to learn how to colour mix and paint realistic skin tones in oil - just head over to our previous article Oil Color Mixing: Figurative Painting & Skin Tones. Not only will you discover color mixing tips for various skin tones, but proper lighting and color temperature techniques as well. There are many more useful tips that you'll find there, so best check it out!
TABLE OF CONTENTS: Looking for something in particular? Jump ahead using the links below:
How To Draw A Face
Step-by-step Guide of Drawing A Basic Portrait
Outlining the general shape of the head
How To Draw The Facial Features
Working on the finer details

Drawing realistic portraits can definitely be a challenge, but this holds true at the beginning for any new technique that budding artists wish to learn. The key to conquering portrait drawing is by mastering each facial feature, in this case the sum of all the right parts will make an accurate whole. It is very important to train your eye to observe the essential details that give each face its own individual identity - the drooping of the eyes, the slant of the lips, the slightly arched eyebrow, and many other particularities that can help you achieve a realistic portrait.
Not to worry, though the human body may seem too complicated at first, it can be simplified and broken down into easier and more manageable parts! Let's give thanks to the generally symmetrical bodies that nature has gifted us with that allowed us to create basic rules of proportions to serve as our useful starting point. Now, let's start with the step-by-step of portrait drawing by first gathering the materials you'll be using for this tutorial.
How To Draw A Face
Before starting, here's a personal tip: Place a mirror in front of you and look closely at your own facial features as you draw your portrait. Why, you ask? Your face is the most familiar face you know, you see it every day of your life and have unknowingly practically memorized all the vital details, so much so that you more or less know if you're getting the proportions right or not. Now, you're ready to start!
What You'll Need:
- A handy sketchbook made of good quality paper and high GSM.
- Graphite pencil
- Ruler (optional)
- Kneaded eraser
- Reference photo (optional)
- Good light source (optional)

Step-by-step Guide of Basic Portrait Drawing
To get the hang of the facial proportions, let's first practice drawing a fully frontal face. In this simplified drawing and symmetry, you can better understand each step-by-step process before moving on to drawing other face angles.
1. Outlining the general shape of the head
The important thing to keep in mind in this first step is to have a good sense of the space on your paper where you plan on drawing your face, so that you can plot out the optimum placement of your subject that will make for a good composition. There's nothing more frustrating than spending so much time perfecting your drawing, and then belatedly realizing that you ran out of space. In the drawing example below, about 2/3 of the ZenART B5 sketchbook was used - placing the head more or less somewhere in the middle. This is generally a good workable size.
- Lightly sketch an egg-shaped circle on your paper, you can use an HB pencil for this if you're worried about drawing too hard. Then make a straight vertical line at the middle of the face, dividing it in half as symmetrically as you can.

- Then make a straight horizontal line in the middle of the face measuring from the top of the head to the bottom of the chin, crossing over your vertical line. At the image below the top of the head, the center, and the bottom of the chin are all marked using blue lines.
- Observe on your model or your reference where the hairline is and mark that on your portrait drawing, in the sketch below it is marked with the topmost red line. Using that hairline marking and the marking at bottom of the chin, divide that section into three equal parts. Below, red lines are used to show these three divisions. These lines will serve as your main guide lines for drawing in each of the facial features.


2. How To Draw The Facial Features
A. Drawing the Eyes
- At the middle of the center blue line, draw two almond-shaped eyes.
Did you know? Human anatomy is quite amazing. The space between the two eyes can be measured with a 'third eye'. This is the approximate separation between the two eyes, leaving a perfect space for where your nose will be placed! With this in mind, make sure that the space between your eyes isn't too narrow nor too wide. Getting the eyes as right as you can is very important in portrait drawing.
- Now, let's fill in the other details. In the middle of each eye, draw a big, dark circle and a smaller one at the center of it. These are your irises and pupils.
- Add the eyelids by drawing two curved lines on top of your eyes, use the shape of your already drawn eyes as a curving guide.

B. Drawing The Ears
- Extend the second red guide line from the top of the head to the outside parts of the face, and mark those points with dots or light lines that are just right at the frame of your face. These points will be the tops and bottoms of your ears.
- The third red guide line from the top is where the bottom of your nose will be, so anticipate that you will draw in that area. It's good to remember that your nose also has the same height as your ears!
- Finally, begin drawing the ears within those line markers.
Reminder: Don't make it too complicated! You can even cover some areas with hair if you choose to do so, don't get bogged down or too intimidated by the details. After all, this is mainly for proportion practice. Let's make it easy and very doable for you. You can always practice drawing more detailed ears at a different time on another portrait drawing.
C. Drawing The Eyebrows
- On top of the eyes, draw your desired shape of eyebrows. Eyebrow shapes vary from person to person and come in all shapes and sizes, so you can freely explore this if you want. If you prefer to copy from a reference, observe your model, or look closely in the mirror (if you are your own reference) to closely copy the shape of the eyebrows.
- A typical eyebrow would be slightly arched in the end and tapering into fine points. It usually starts alongside the inside corner of your eyes, but you can easily adjust this depending on each person's individual proportions.
- Pay close attention to the thickness and thinness of your eyebrows. Later on, it will be easier to fill this in with individual hair strands, you can draw some now if it helps you visualize it.

D. Drawing The Nose
- From the inner corners of your eyes, draw two straight lines going down up to the third red guide line, it's also the level of where the bottom of your ears are. These are the marking points for your nose.
- Begin drawing the nose while being careful to stay within those lines!
- The tip of the noise is usually rounded, so once you reach that point, draw a very light circle to serve as a shaping guide.
- Sketch two small oblongs with tips tapering (almost like teardrops but curved) towards the center very lightly under the tip of your nose on both sides. These will be the nostrils.
- Pay close attention to the size and shape of your nostrils, make sure that the holes you draw are not too big nor too small. Unless of course that is what you can clearly observe on your model or reference. When not done carefully, it could ruin the proportion of your portrait drawing.
E. Drawing The Lips
- Using the third and fourth red guide lines, divide that section into three equal parts. The opening of the lips is marked at the first dividing line (shown using a red line at the drawing below).
- Using the same guide lines (bottom of the nose and chin), divide the section into two equal parts. The center line marks the bottom of the lips (now shown with a blue line at the drawing).
- To identify the width of your lips, lightly draw two straight lines from your irises going down until you reach the red line marking where the opening of your lips are going to be.

- In the portrait above, the lips were intentionally drawn to be not too wide, so drawing the width was stopped a little before reaching the marking points. You can also adjust the lips according to the width and fullness that you desire.
- Make sure your lips are not all straight lines, even the thinnest of lips still have curves in them. Add the necessary curves in the middle, on the sides, and the bottom of your lips, depending on the shape you wish to make.
- And don't forget your cupid's bow -- the very small inverted C-like peak at the top and center of the lips. This is a very important feature of the human face, and makes a big difference in defining individual lip shapes when aiming for realistic portrait drawings.

3. Working on the finer details
A. Hatching Out The Hair
Our eyebrows, lashes and hair are very essential details that make an individual. How it varies from person to person in every way imaginable just shows us how magical nature is. Before you begin working on the hair, decide which type of hair you want for your portrait. Wavy hair? Curly? Straight? Followed by the length and the styling. Does the person in the portrait have their hair up in a bun? Have very short hair? Mid-length? Long? Styled? Partly covered? All these details make a difference on the end result that you want to accomplish.
Eyebrows
- Observe your own eyebrows, as well as other people's. Study how the thickness or sparsity differ, and even the direction of the hair growth. The strands of hair in the eyebrows usually go upward from the middle of the eyes, and then gradually go down as it progresses to the sides.
- Erase your guide lines and other unnecessary details using your kneaded eraser, having a clay-like malleability is so useful, you can easily shape it into whatever form or size you need! This is why it's very important to lightly draw the details that you know you will certainly have to erase afterwards, one less thing to worry about later when portrait drawing.
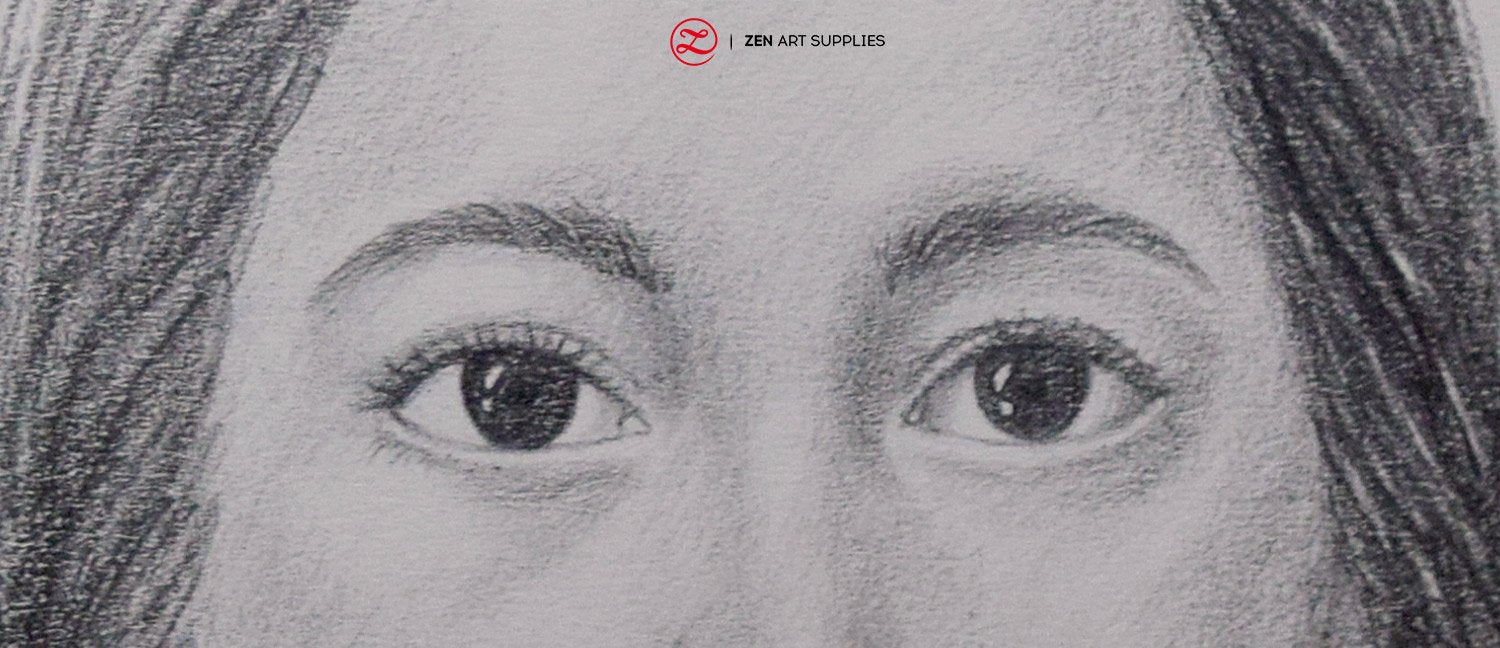
Eyelashes
- Start sketching very light and thin hair starting from the outside of the eyes going in. If you've ever looked at a fallen eyelash closely, the hair at the root is thick, and tapers to fine and thin tips.
- Draw them with curved strokes going upward and curving inward when drawing the lashes at the outer parts, then gradually switching to the opposite direction once you go past the middle of the eye and heading towards the inner corners.
- Remember: As you go inwards, the hair strands become shorter and thinner until they are almost non-existent at the innermost portion of your eyes, near your tear ducts.

Hair
- First, establish what type of hair the person has as mentioned above.
- Define the shape of the hairline and hair-root around the face.
- Begin drawing in the direction of the hair growth. Outwards for the top of the head, and then flowing as it goes down. This all varies depending on the type, length, and style of the hair you are drawing.
- Work in minimal strokes while focusing on the direction of the hair. The head usually takes a longer time to fill in because it's a lot after all! But don't despair, you can totally do this!
- A tip: You can shade the whole head of hair lightly, then add cross-hatching after.
- You can use your kneaded eraser by lightly erasing the parts where the highlights of the hair are.
Finish up by adding the necessary shadows, highlights, and contrast through shading and more cross-hatching throughout your whole face. Don't draw hard lines unless you see an actual line, using hard lines when you shouldn't will instantly age a youthful model or reference. Remember, the skin is not a hard surface and your portrait drawing should reflect that.
Here are some reminders to help you on your portrait drawing journey:
- Observe and practice what you have observed. Carefully examine what you see in the mirror and understand the lines and curves of a human face.
- Train your brain to see the most essential details.
- Draw lightly so it's easy to erase afterwards and won't leave any unwanted marks.
- There are two major elements that influence a drawing: The first is drawing from what you see, and the second is drawing from what you know. What works best is a combination of the two.
- I'm sure you hear this often but it bears repeating as it's really true! The more you draw and practice, the better you will become. So, just keep at it and before long you'll be creating realistic portraits of yourself and of others!
Which facial feature is the most challenging for you to draw? Which part of the face do you enjoy drawing the most? Did you use your own face as reference when you first drew a portrait? Let us know what you think, we'd love to hear back from you. Feel free to leave a comment, and we'll be happy to answer any queries you have.
Learn how to draw faces besides the frontal view in our next article - How To Draw 3/4 View Face: Step-by-step. Until then, have a great time practicing and drawing portraits!

- MEET THE AUTHOR-

Kathleen is the Wordsmith at ZenART, resident artist and art editor. When God sent a shower of talents, Kathleen made sure she got a basketful of them! She's a visual artist with practical knowledge on various fields from painting and sculpture, to costume and set design which comes in very handy when writing about various art techniques and theories. She also shares her passion for the arts through teaching. She runs her own brand of handmade wirework jewelry designs.


