Basic Sketching Tools You Need | Sketching Techniques Step By Step | Useful Sketching Tips To Remember
Sketching is the most basic and fundamental art skill that most artists start with and continuously hone through the years. And with good reason! When an idea pops into mind, we make quick sketches and studies of it for record keeping and for further refining later on. It's the foundation upon which we build our paintings on, where we explore and finalize our compositions. Granted that some do paint straight away minus the sketch. You'll thank yourself someday just by learning the basic sketching techniques at the very least.

TABLE OF CONTENTS: Looking for something in particular? Jump ahead using the links below:
Basic Sketching Tools You Need
Sketching Techniques Step By Step
Warm Up Line Exercises
Different Shading Exercises For Sketching Techniques
Useful Sketching Tips To Remember
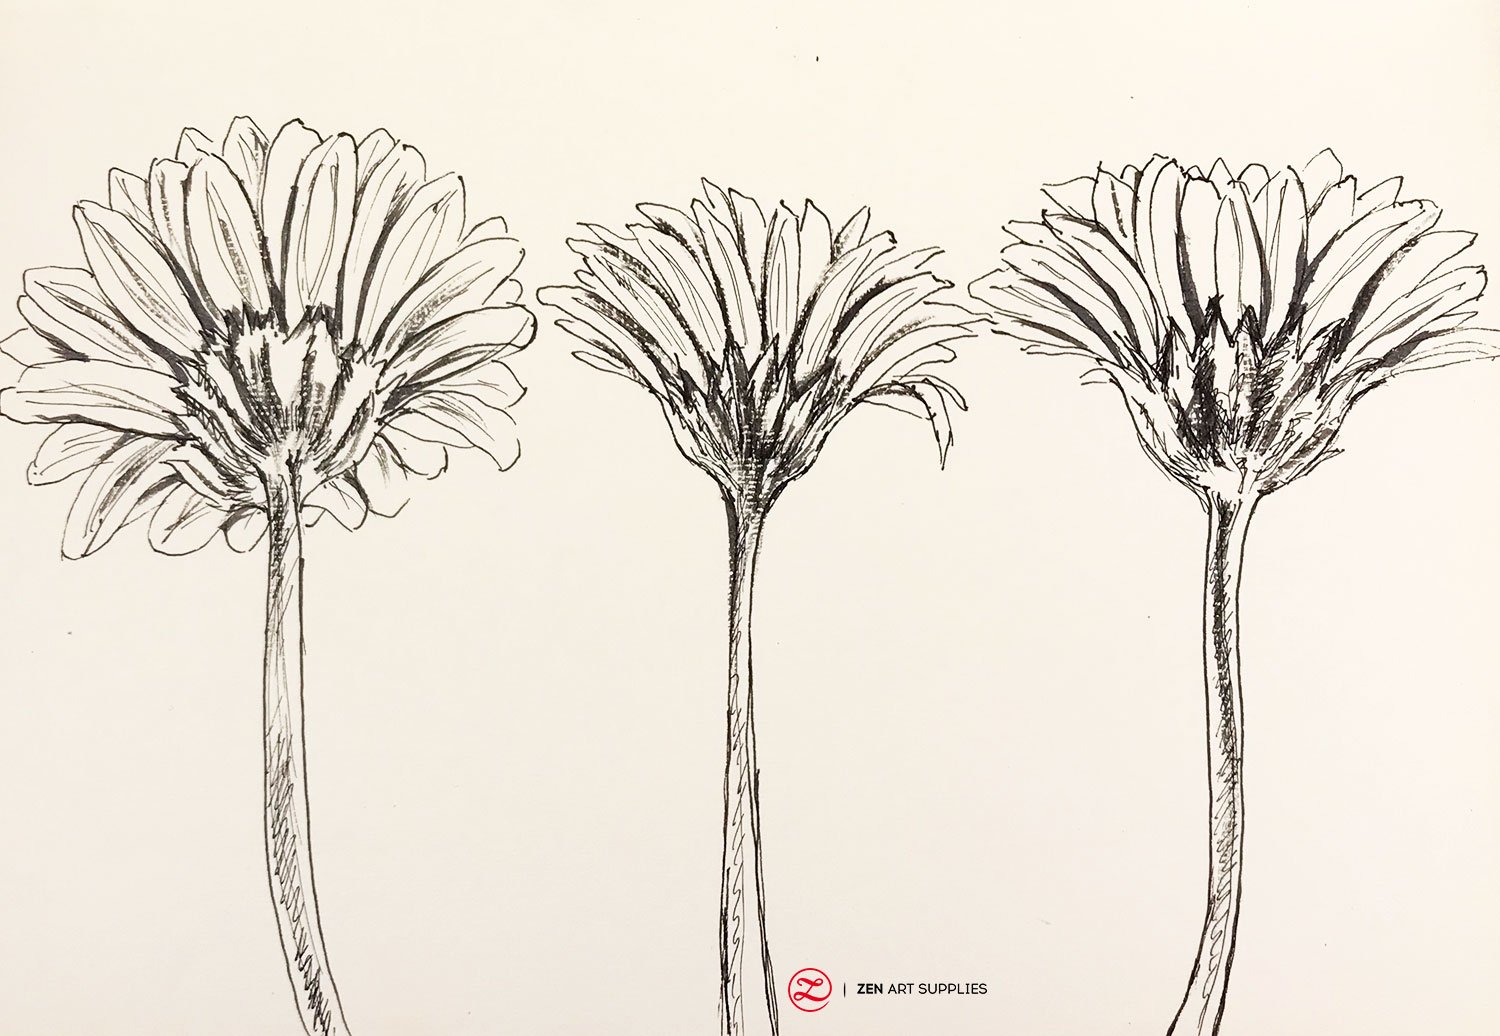
You can easily practice sketching anytime and anywhere. All you need is a sketchbook and a pencil or a pen, and you're good to go. Sketchbooks are a must for any artist that wishes to learn and improve their sketching skills. When I know I'm going to be spending a lot of time waiting somewhere, I always make sure to have my sketchbook with me. As you become more confident, you slowly add various pens and other whatnots to your sketching arsenal.
Basic Sketching Tools You Need
Having a good working knowledge and better understanding of the various tools is important. For example when I teach drawing to my young students, I ask their parents to buy a specific graphite pencil grade - 6B. It's not because I'm being picky or anything, there's a perfectly good reason for it.

Graphite Pencils
I'm sure you've seen those labels on the pencils - H, 2H, HB, B, 2B, 3B, F and so on. But what do they mean exactly?

H stands for Hard. B for Blackness. And F for Fine. The lead in the graphite pencils are not actually lead. They're a mix of finely ground graphite and the binder that's clay.
H graphite pencils have more binder than graphite in them, creating a harder lead that's more grayish in color. This also means that they maintain their sharpness longer. It's ideal for light precise strokes (think of those basic sketching techniques for watercolor painting for example) and technical drawings. You won't get much blackness no matter how much pressure you use, it will just leave deep grooves on your surface. So keep that in mind when using H pencils.The higher the number, the harder and lighter it will be.
B pencils have less binder and more graphite, making their lead softer but also blacker. They dull much more quickly than the Hs. But they're the best for creating expressive and dramatic sketches and drawings. By simply adjusting the amount of pressure you use, you can modify the blackness and the line weight of your strokes. These are the pencils you use for shading and creating those beautiful contrasts. The higher the number, the softer and blacker the lead is.
F pencils are very firm, and so make very fine, sharp points when sharpened. So for even more precise strokes, this one is perfect. It's just like HB but much harder.
And then there's the EE. Where Hs and Bs have clay as their binder, Es are a mix of charcoal and graphite. They create even darker marks but have a more matte finish because of the charcoal.
My favorites are the HB for light sketching and the 6B for drawing and shading. For me, 6B is the best all around graphite pencil for all those pencil sketches techniques. You can also try out the woodless pencils if you don't enjoy sharpening.
Pens
The usual suspects here are ballpoint pens, technical pens, drawing pens/art pens, brush pens, and fountain pens. And let's add the water brush pen to the sketch supply list, too!

Ballpoint Pens allow you to shade similarly to pencil shading and are quite versatile. The ink is seemingly endless and you don't have to worry that it won't write if you use it on a vertical surface.
Technical Pens and Drawing Pens are great for precise lines and strokes. And they come in a multitude of point or tip sizes. Most drawing pens already come with permanent or waterproof pigment. They come in all sorts of colors nowadays, so you can totally play around with them.
Brush Pens make it easier for you to cover shaded areas in a short amount of time. With just a few sweeps, you've got your black areas down to pat.
Fountain Pens come in a variety of nib width sizes and hardness. Steel nibs are cheaper, but harder. While nibs with gold have more flex to them but of course make them more expensive as well. If you're looking to make smaller sketches, then go for extra fine nibs. I myself prefer a fine to medium sized nib. With fountain pens you have the option to use non-permanent and water soluble ink. You can create sketches and use a water brush pen to create some shading by letting the ink bleed.
I have water brush pens that I fill with ink, one which I'm fond of using lately is filled with the Japanese Sumi ink.
Paper For Sketching Techniques
Your choice of paper will also affect the end result of your work. Thankfully you can easily buy sketch pads and mixed media sketchbooks that are specifically designed for drawing nowadays just about anywhere. They will just vary in size, the amount of smoothness or toothiness, tone (some are creamier than white, and there are also grey and sepia colored ones), their thickness, and whether they are acid-free or not.
The texture and the tone are mostly a matter of preference. If you're going to be doing heavier and darker sketching, choose a thick enough paper to be on the safe side.

Erasers
Erasers are quite useful and not just for correcting mistakes. I use my kneaded eraser to create soft highlights here and there by dabbing softly on those spots. And a hard eraser for sharper highlights.

I highly recommend that you have a sketchbook that you can bring along with you anywhere. The not so secret thing to becoming good in sketching is practice, practice, practice. Continuous and habitual daily practice, and this is where that handy sketchbook comes into play. If you have it with you all the time, then there's no excuse not to practice.
Sketching Techniques Step By Step
The thing to keep in mind about sketching is to let go of the idea of perfection. The goal is not to be perfectly accurate, but instead to capture the essence of what you're sketching. If you make a mistake, no worries, keep the wonky line and just draw another over to make corrections. Sketching is not meant to be refined like a finished fully-rendered drawing, think of it as the bare bones of that.
Let's start with some warm up line exercises for our hands. After all, sketching is all about lines!
Warm Up Line Exercises
Pencil sketches techniques will slightly differ from the pens. With pencils you can easily vary the tone and line weight by simply adjusting the amount of pressure you exert on the pencil. While with pens, you need to go over the surface areas that you wish to darken repeatedly.
Graphite Pencil
Divide your paper into 8 equal sections, one for each line exercise below. Use a 5B or 6B pencil, they're the most versatile of the whole lot. You can go from the lightest line by hardly applying any pressure and holding the pencil far from the tip. You will have less control, but your lines will be lighter. For very dark and heavy lines, apply more pressure to your pencil and hold it closer to the tip.

Vertical Lines - draw vertical lines from one end of the paper to the other end. Vary the line weight, from heavy and bold and slowly working towards light and thin, and then back again. Try to draw them as close to each other as possible to practice your hand eye coordination at the same time.
Horizontal Lines - draw horizontal lines this time, you can start from the top or the bottom, it's up to you. Do the same method as the vertical lines exercise above.

Diagonal Lines - start from one corner of the box and work your way towards the opposite corner. Again, continue with the varying line weights and keep them close to each other.
Zigzag Lines - draw at least three peaks to practice your zigzag lines. Continue with the same line weight and distance practice as before. Try to follow the zigzagging of each previous line to create a uniform pattern.
Wavy Lines - draw soft waves with no peaks to practice soft curving lines. Do the same process as the previous lines.
Scroll - start from the center of the box and slowly work your way outwards. You don't have to vary the line weight, just try to keep the spacing of the lines evenly apart. But don't stress too much about it, just keep practicing. Good sketching techniques take time to master.

Broken Lines - start with broken lines of the same length, with even spacing. Then slowly vary the line weight as you work downwards or upwards. Do this until midway through the box. For the other half, use broken lines of varying lengths. Broken lines are great for creating natural looking textures.
Pattern - and now for the fun part! Create your own pattern using lines, this is totally up to you. For mine I'll create the Seigaiha, the Japanese wave motif that is just simply beautiful.
Pens
Draw 12 good sized boxes or circles on your paper, 9 will be for the line exercises listed below and 3 for your pattern creations. With pens, drawing your lines quickly and slowly makes a difference. It's a way to slightly change the intensity of your lines and strokes. Quick strokes result in less controlled looking lines that have a more natural textural finish. There's no better way to fully understand it than to try it out for yourself. I suggest you first do these exercises using drawing pens or technical pens. I'm using a 0.4 sized drawing pen, it's the perfect size for these basic sketching techniques.

Slow Vertical and Quick Short Vertical - first try it out with slow vertical lines. Apply an even pressure from one side to the other end, draw your lines closely together. Then follow with quick vertical lines but with shorter strokes. You can cover the entire circle or vary the placement as I did with mine.
Slow Horizontal and Quick Short Horizontal - do the same as above but instead with horizontal lines this time.

Slow Diagonal and Quick Short Diagonal - still the same as before but now with diagonal lines.
Quick Long and Short Vertical - now it's time to mix them up. Start with quick long vertical lines covering the entire circle. Then add short vertical lines in between the spaces of the long ones.
Slow Cross Contour - cross contour lines are curved lines that help define the form and volume of the object. Instead of an outline, cross contour lines help the object take a more solid form by mapping how our eyes move across the surface of the object/s before us. For this exercise, create lines that follow the form of the circle, to turn it into a sphere.

Broken Curved Lines - alternate curved lines of dips and hills, vary their lengths as well. With this exercise you can create organic looking textures.
Patterns - create your own using various lines and just have fun with it!
Different Shading Exercises For Sketching Techniques
This time around let's do the pencil and pen exercises side by side for a closer comparison.
Hatching
With Hatching, you shade using parallel lines that are drawn close to each other. They don't intersect. The closer the lines are to each other, the darker your shading will be.

Cross-Hatching
Cross-hatching are lines that intersect each other, whether in crosses or exes - or both. The more lines that cross over each, the darker your shadows will be.

Scribbling
Scribbling uses hurried and seemingly haphazard circular lines to create shading. To deepen the shadows, just overlap scribbles over scribbles until you reach the desired value.

Stippling
Stippling is when you use dots to add shading to your form. To darken the shading, add dots that are close to each other. This is by far the most time consuming sketch technique. I don't often use this but it does come in handy every now and then for certain effects.

Circling
Don't be confused between scribbling and circling. Where scribbling is more haphazard, circling is the refined version. Use controlled small circular strokes to do some finely blended shading, the circular lines shouldn't be clearly visible. This requires good constant control over the pressure you apply.

Blending
When blending, your lines should smoothly transition between the values. You can blend by fine shading with your pencil, this requires patience and practice. Start with evenly applied pressure, and simply pass over the areas that require deeper shading again and as often as needed. It's much easier to maintain the smooth blending when slowly adding the additional shading in smooth layers. You can also use the tips of your fingers or a blending stump to smudge the pencil marks for a very smooth shading.

Useful Sketching Tips To Remember
Place a clean piece of paper under your hand when drawing over finished sections
This is especially important when using graphite or charcoal. You don't want to unwittingly smudge all those parts that you've already worked on.

Practice and become familiar with how you handle your sketching tools
How and where you hold your pencil or pen will make a difference. What happens when you hold it at an angle? How about gripping it near the tip or loosely holding it at the other end? Experiment and try them all out in various ways, that's the only way to become familiar with how you can use your tools and for what effects.

Always bring your sketchbook with you
As I mentioned earlier - constant practice is the best way to hone your sketching techniques. Choose a sketchbook that's handy and easily fits in your bag, that way you always have it with you wherever you go. Just like ZenART's Artist's Sketchbook that's specifically designed for artists on the go. Try to make sketching a daily habit, you'll see a great improvement in your skills before you know it. If you find yourself at a loss or you're feeling uninspired, here are some sketchbook ideas to help you out.

Let go of the concept of perfection
Sketching is not about getting everything as accurate as you can on the first go. It's about training your eyes to observe and see things correctly and to quickly capture the form, the rhythm, and the movement of your subject. Embrace the wonky lines, the accidents, and the mistakes. All of these contribute to your development as an artist. You can always work on the finer details and make corrections at a later time.


Simplify complex forms into basic shapes
When viewed as a whole, the human body for example just seems so complicated. But there's a secret to it. You can break it down into simpler shapes that you fit together to create the whole. Instead of focusing on the complexity of the big piece, simplify the process by dividing it into more manageable smaller parts.

Become familiar with the composition rules to guide you
To become even more savvy with your sketching, I recommend you also get acquainted with the rules of composition. Knowing the golden rules of composition and learning the various composition tricks you can use will greatly improve the quality of your sketches. Your choice of composition can make or break your final work.

Don't be afraid to experiment and explore new things
By nature we instinctively gravitate towards things that are familiar and comfortable to us. There's nothing wrong with that. But for an even deeper growth as artists, we have to train ourselves to go out of our comfort zones. It can be scary or challenging at first, but the rewards will be well worth it. You get to learn new skills and eventually develop your own process.

And don't feel that you need to be confined to the sketching materials listed above. Using mixed media for your sketching is so fun, try doing watercolor and ink sketches, too! And anything else that you want to explore.

And that's the end of the line for the basic sketching techniques, I hope you learned something useful. Take your time and try them all out, remember that we all have different learning curves. So I hope you don't get too frustrated and disheartened when you don't get things right as quickly as you expected. Just keep at it and I promise you will get better one step at a time.
We'd love to hear back from you!
Which technique are you already comfortable with? How about the ones that you'd like to try out? What do you find yourself sketching the most? What future content would you like to see from us? Let me know in the comments below! Join our friendly art community Painting Inspiration Daily on Facebook. You can share your art and ideas, watch LIVE tutorials, and be inspired to paint!
Next on Toolkits - Best Travel Watercolor Set featuring ZenART's watercolor palettes. Find out what makes them pretty handy to bring along. Meanwhile, have a wonderful time trying out the various sketching techniques!
- MEET THE AUTHOR -

Kathleen is the Wordsmith at ZenART, resident artist and art editor. When God sent a shower of talents, Kathleen made sure she got a basketful of them! She's a visual artist with practical knowledge on various fields from painting and sculpture, to costume and set design which comes in very handy when writing about various art techniques and theories. She also shares her passion for the arts through teaching. She runs her own brand of handmade wirework jewelry designs.


