Using A Viewfinder | Using The Amazing Pencil Trick | Useful Tips & Tricks
If you haven't yet come across our in depth guide, Golden Rules of Composition - Explained & Illustrated, please do consider checking it out. Understanding the composition rules covered there will be of great help as to how well you use the tips and tricks shared here.
TABLE OF CONTENTS: Looking for something in particular? Jump ahead using the links below:
Using A Viewfinder
How To Make An Adjustable Viewfinder
More Viewfinder Options
The Amazing Pencil Trick
What an exciting time to be an artist in this modern world! Centuries of learning through trial and error, explorations, experiments, and countless frustrations have led to the development of the various composition rules and techniques that we now have today. All these readily available tools can help you create your own original compositions that not only capture the viewer's eye but will hold their attention as well.

A good composition in art is a pleasing arrangement of the different elements with respect to the principles of art. To achieve this, think of it as how good storytelling would go - you have your main characters and your supporting characters, how their relationship with each other goes and how it evolves is a great part of any story. You decide what kind of story you want to tell, in what setting, with which characters, and most importantly, what message you want to leave your audience with. There are so many stories that have yet to be told, and these following tricks of the composition trade are here to help you start your own story.
Using a Viewfinder
The viewfinder works in the same way as a photographer's camera. It helps the artist decide on an excellent composition -- what to include in the frame, where various elements would be ideally placed, and the overall look of the art composition. It's quite effective in keeping your focus centered, and thus keeping you from getting easily distracted.
A viewfinder is fairly simple to use and easy to make. Just like in photography, the more you practice using it, the better your final composition in art will be. Be open to your surroundings, be more observant to everything around you and you'll be surprised at what naturally existing compositions are already around us that are just ripe for the picking or more aptly - viewing. Find out below how you can make your very own DIY adjustable viewfinder!
How to make an adjustable viewfinder
Using a black or dark grey card, make two L-shaped brackets that are 3 cm (1") wide and 20-23 cm (8"-9") long. These colours are highly recommended as they won't easily distract you from your subject, allowing you to properly configure your chosen compositions in art. Instead they slowly fade into your periphery, becoming the best frames anyone can ask for.

Next, form a rectangular window by placing the L-shapes together to form a box of sorts (see examples below). The window they create will be the frame for your potential subjects. You can attach the L-shapes together using either a tape or clips.
Things to remember:
- Simply hold the viewfinder at arm's length, experiment on which orientation you prefer for your chosen subject - portrait or landscape - and also how narrow or wide your framing should be.
- Close one of your eyes for a better focus and make sure that you can clearly see your subject through the window of your viewfinder.
- Move and adjust your viewfinder around until you find a balanced composition that you are happy with. Take your time and try to enjoy this process, there's no need to rush. You'll end up with better compositions in art if you take more care in the choosing and the framing of your subjects.
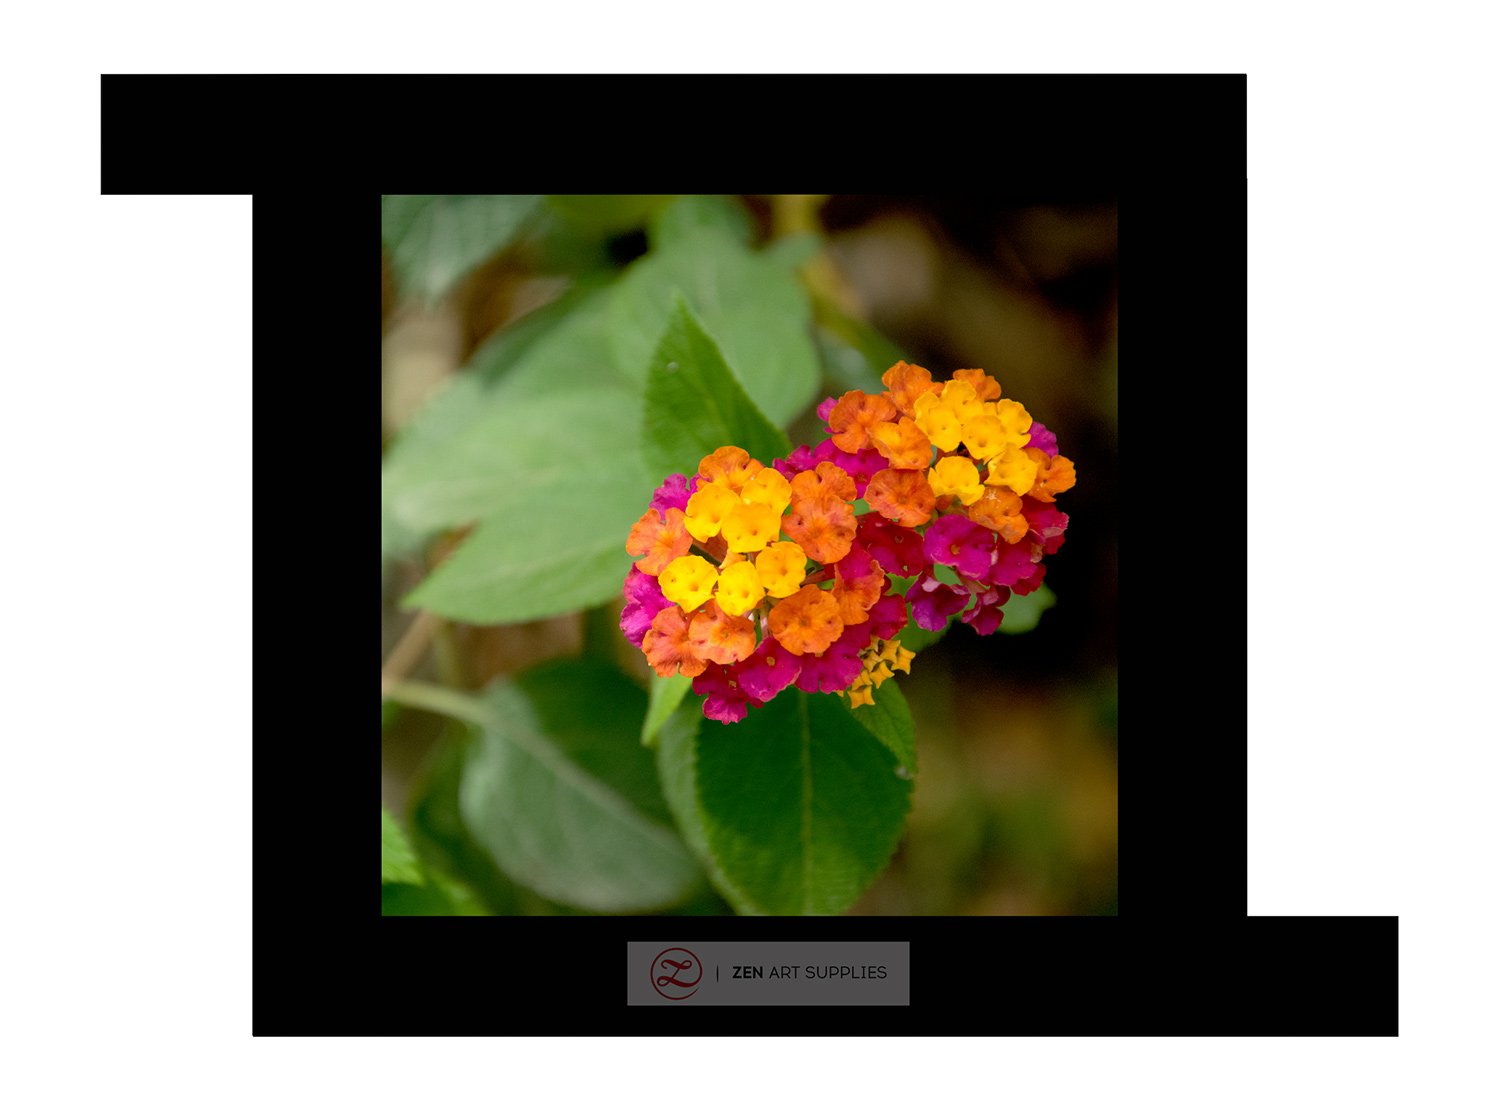


If you are unable to make these brackets yourself, don't give up just yet! You can find a store that offers photo or art framing services and have them make one for you. Or better yet, you might want to ask them if they have any scrap frames lying around that you could have for free. Waste not, want not after all!
More Viewfinder Options
For those times that you don't have your adjustable viewfinder with you, or maybe you prefer a more modern or an easily accessible one, I'm pretty sure you'll have at least one of the following options below that you can use instead.
Using your Camera's Viewfinder
If you own a camera, then you already have a handy viewfinder right there. You can easily adjust the focus and depth of field, zoom in or out on your subject of focus, and with most modern cameras - turn on the grid guide to help you.

Using your Smartphone Screenshot
With the advent of smartphones, we artists now have this super convenient portable tool that we almost always have with us wherever we go. The built-in cameras of the latest models are getting better and better, someday they'll be almost as good as the DSLRs or mirrorless cameras.
Make sure to first turn on the grid option in your camera's settings if you want to have a grid guide. Now, when you use your smartphone's camera, it'll have the rule of thirds grid showing on the screen. Once you have decided on your subject and have framed it accordingly, take a screenshot of the screen. Another option is to take the photo, open it in a photo editing app and choose the crop option. This will add grid guides and then you can take a screenshot at this stage.


Using Hands as L-shaped Brackets
If you find yourself without all of the above options, you still have your two hands! Make two L shapes using your thumbs and forefingers from both hands. Bring them both together to create a viewfinder frame. Now, you're all set to go!

The Amazing Pencil Trick
Making guesswork with the measurements can oftentimes lead to disaster. Imagine spending hours on your artwork and then suddenly sensing that something seems off. The last thing you want is to have a finished composition in art that has very obvious imbalanced or skewed proportions, that could be easily avoided by doing more accurate measurements.
To achieve optimum measurement accuracy, it is advisable to use a tool to find out proportions and relative sizes within your composition. But, if you find yourself without one, this amazing pencil trick is a handy and efficient technique that you can use to aid you.
- Simply hold your pencil at arm's length. Make sure your arm is stretched straight out and not curved at the elbow in any way, otherwise there's a strong chance of you getting differing measurements for every different angle your arm makes. A straight arm is important to maintain.


2. Close one of your eyes, again for better focusing. Just like how you would when you peer into the viewfinder of a camera.
3. Line up your pencil with what you want to measure.

4. Slide your thumb up and down the shaft of your pencil as needed to take the measurement until you find the right placement.

I do hope you have enjoyed and found the tips and tricks in this quick guide useful. In my experience, the golden rules created by great artists of the past are worth learning from, studying their masterworks and understanding the compositions they made - what made them masterful and what makes a great painting.
There's no need to reinvent the wheel, especially for those of us who didn't go to art schools, and unfortunately don't have enough free time to read the countless books that teach compositions in art and other art theories in great detail. It's good to learn from the masters, and someday to strike out on your own, bend the rules, and maybe even learn how to break them fantastically!

What are you most comfortable using as a viewfinder? Do you measure using the pencil trick when sketching still life or figure models? What future content would you like to see from us? Do let us know your thoughts, we'd like to hear back from you. Feel free to leave a comment, and we'll be happy to answer any queries you have. We'll be bringing you more in-depth information and tutorials on the points we have mentioned here in the future. Keep an eye out for our next one - Rainbow Colors of the Impressionists. In the meantime have fun creating!
- MEET THE AUTHOR-

Ardak Kassenova is a London based contemporary artist, co-founder and creative director of ZenART Supplies. Her visual style-contemporary impressionism-share similar aesthetic qualities with those by the French Impressionists. After 20 years of a successful corporate career, becoming a mother to two wonderful girls, and with the continuous development of her practice by taking private lessons from the best artists she could find; Ardak decided it's time to align her life with her true passion, Art. Driven by this passion and her corporate leadership background, she co-founded ZenART.
"My heart and soul were always with Art, and since my childhood as long as I remember myself, I was dreaming to be an artist. I was painting after work, when I had time, and teaching myself through the books, videos, visiting art galleries and museums. I've been very curious about different techniques and styles, and therefore accumulated knowledge and experience on a variety of mediums."
Read more about Ardak Kassenova in this feature. Say hello to @ardak_zenart on Instagram!


